This post provides the initial steps to get started on IBM’s Bluemix (currently in beta). Bluemix is open-standard, cloud based Platform-as-a-Service (PaaS) from IBM. Bluemix allows one to quickly put together mobile, web, Big Data, IoT applications. Bluemix is an implementation of IBM’s Open Cloud Architecture, Cloud Foundry which enables developers to rapidly build, deploy, and manage their cloud applications. The developers can tap into a growing ecosystem of available services and runtime frameworks.
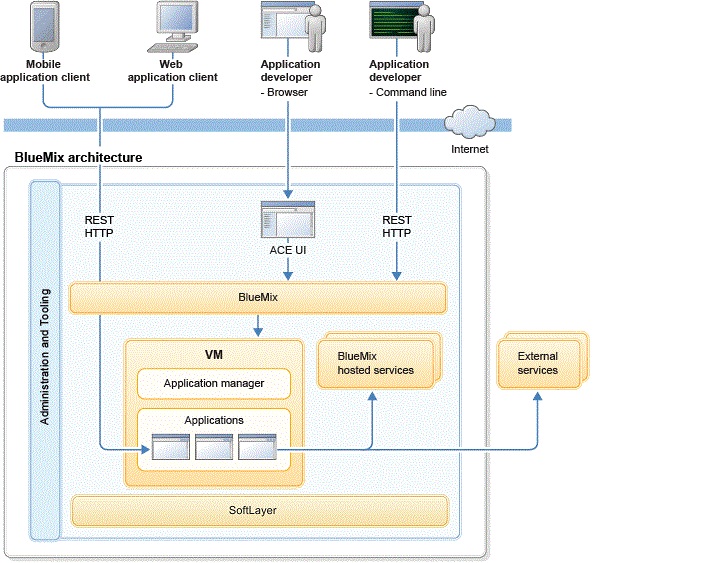
Bluemix uses the Softlayer infrastructure to host the user applications. Clients/developers interact with Bluemix either with HTTP or REST as shown below
Here are the steps to get going on Bluemix
First things first
I would suggest that you get all the registrations and installations right away.
Bluemix dashboard– Get started by creating an account on Bluemix. This will provide you access to the Bluemix’s dashboard from which you can quickly create applications (mobile, Web, IoT, BigData) etc
Devops: Register for an account with Devops. Devops allows you to easily develop, deploy and track your code online. Devops also allows you to collaborate with others by forking code from their Git repositories
Cf Interface : Install the Command line interface ‘cf” to Bluemix. The ‘cf’ command interface is built with Google’s Go programming language. With ‘cf ‘you can login to Bluemix, create an application, add services and manage your application. You can also do this from the Bluemix’es dashboard.
Install Git: There are multiple ways to develop code for Bluemix. Git command line happens to be one of them, So it makes sense to have this installed. You can install this from this link https://hub.jazz.net/tutorials/clients#installing_git
Install Node.js:The application that this post discusses is based on a Node.js based application so it will help to have it installed. Node.js is a platform that enables building of fast, scalable network applications and created by Ryan Dahl.
Kicking off Bluemix : A good first application to get moving on in Bluemix is the already available Sentiment Analysis of Twitter. This application uses the Node.js ‘sentiment’ module to perform some basic sentiment analysis.
The quickest and most painless way to get started on Bluemix is to ‘fork’ the code for Sentiment Analysis from Devops.
1) Login to your Devops account. Click the following Sentiments link from Devops, in which I have created a slight modification to the sentiment analysis application. You can also clone the code from GitHub at sentiments.
2) Click the Edit Code button at the top. This will open the files and directories in this project (see picture below)
3) Next click the “Fork’ button on the panel on the left side. This will create a copy of the above code in your own repository (see picture below )

4) The Twitter sentiment analysis code is in app.js written in Node.js. You can make changes to the code as needed. I have made a few modifications to the code that I had forked. I added changes which adds a textual output of the Twitter sentiment
;
How to make code changes with Web IDE
5) To make code changes double click the app.js file. This will open up the code window. You can use the GUI based IDE to make the code changes and merge with the master branch, The steps are
a) Make the necessary changes and click the symbol shown

3. This will open a new window as shown below
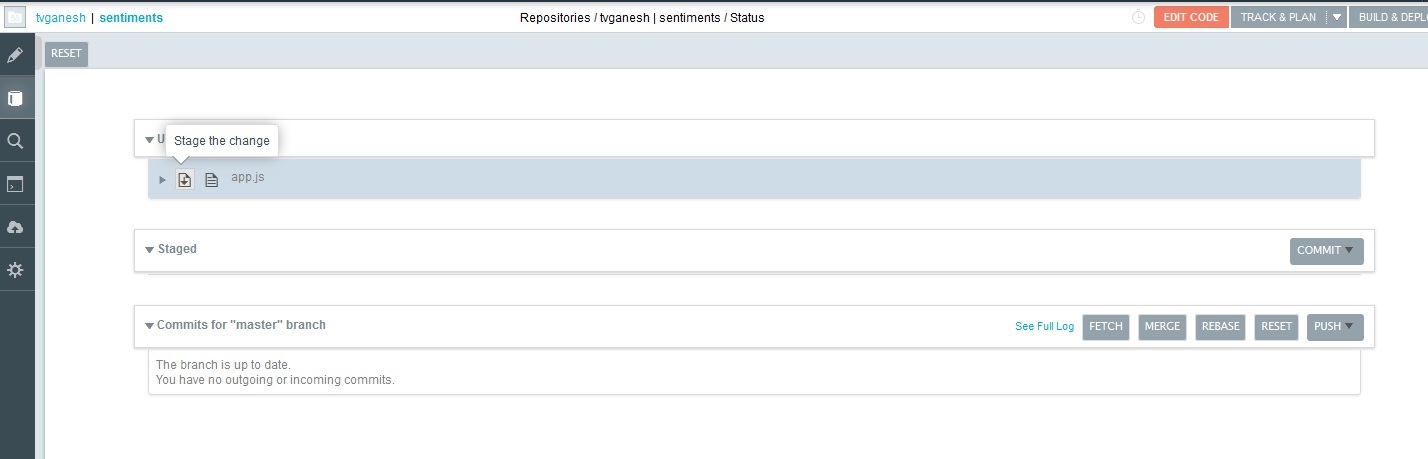
4) Click the ‘Stage to change’ button.
5) This will move the changes to Staged. Click the ‘Commit’ button and enter the reason for the change and click the “Submit’

6) This will move the changes from ‘Staged’ to ‘Commits for master branch’
7) Now click ‘Push all’ and click ‘Ok’ in the Git Push popup window. This will merge the changes into the master branch.
8) Once this done click ‘Build & Deploy’ button
9) Your changes will transition from ‘Pending’ to ‘OK’. Now click the ‘Manage’ button. This will deploy the application with the latest changes on to Bluemix.
10) Do the following to populate the details for the parameters below with a Twitter app that you create for your application
var tweeter = new twitter({
consumer_key: <your API key>,
consumer_secret: <your API secret>,
access_token_key:<your access token >,
access_token_secret: <your access token secret>
});
11) To do this log into http://dev.twitter.com
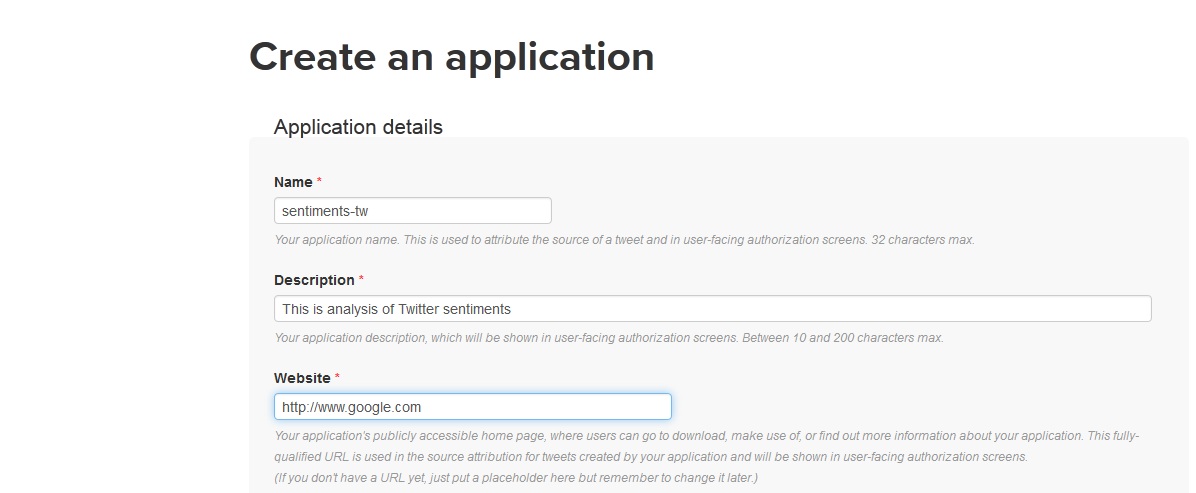
12) Click My applications where your picture is displayed and then click Create application.
13) Enter the details for Name,Description & Website (can be any valid website) and then click Create Twitter application.. This will create the Twitter application.
14) Click the API tab. Scroll down to the bottom and click “Create my access token”.
15) This will generate the Access token & Access token secret. Enter all the details (API Key, API secret, Access Token, Access Token secret into app.js and push to the master branch before deploying on Bluemix
Code changes with Git command line
11) Incidentally the changes to code can also be made through the Git command shell as follows
a) git clone https://hub.jazz.net/git/tvganesh/sentiments
b) Modify the code using any editor and save the changes
c) Go the directory containing the files and do
git add *
d) git commit -m “Cosmetic” app.js
e) git push
This will push the changes to the git repository in the master branch
8) Click the ‘Build & deploy’ in the top right corner. You should see this
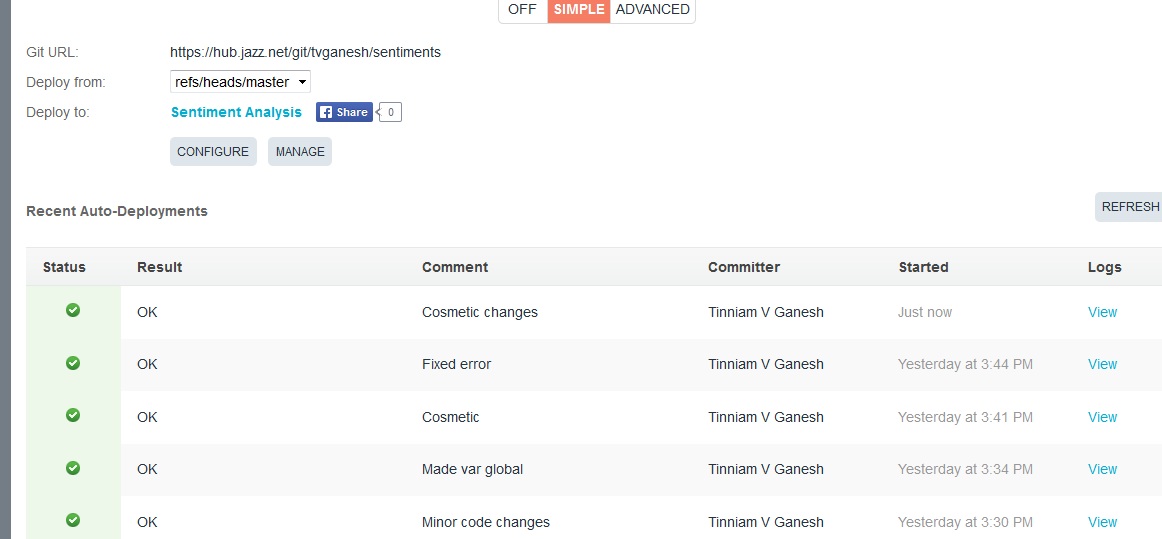
9) Click the ‘Manage’ button which will push the application onto the BlueMix
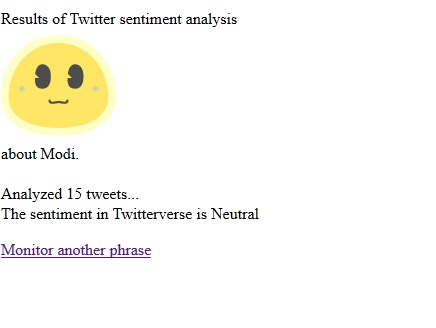
10) To test this application click the link next to ‘Routes’ . Enter a phrase that you would like to search and hit ‘Go’
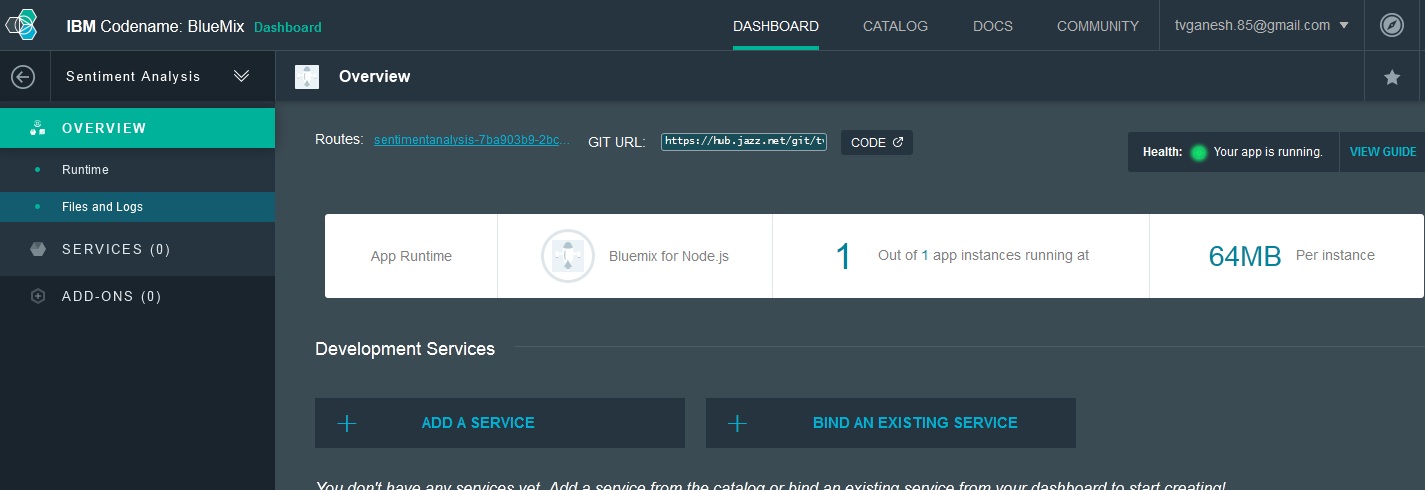
You should see the application checking Twitter periodically for the tweets.
Thats it! You have built your first Bluemix application.
The ability to integrate Node.js into your cloud application allows one to easily create powerful applications.
Hasta la vista! I’ll be back!
Disclaimer: This article represents the author’s viewpoint only and doesn’t necessarily represent IBM’s positions, strategies or opinions


Reblogged this on Dinesh Ram Kali..
LikeLike