This post is a continuation of my earlier post ‘Getting started with mobile cloud in Bluemix‘. Here I take a test drive of the push service that Bluemix offers based on the article “Extend an Android app using the Push cloud service” from developerWorks.
This post assumes that you have already completed the changes from my earlier post for the mobile cloud. If you haven’t, you could clone the code from “mobile data” which is the official IBM version of this app and includes all the changes needed for persisting data in the cloud through their Android.
The Mobile Cloud App I created on Bluemix is “mobtvg“. The main steps to have Push notification service using Bluemix are
- GCM services : Get Google API Project number & GCM API Key
- Include the Google Play services library project
- Add the jar files to enable Push service
- Modify the server side Node.js file to send push notifications to all registered devices
- Make necessary code changes
- Run the application and test for notification
Here are more details on the above steps
a) GCM services : Google Cloud Messaging for Android (GCM) is a service that allows you to send data from your server to your users’ Android-powered device, and also to receive messages from devices on the same connection. The 1st thing to do is get the Google API Project number & GCM API key.
– Click on Google Developer Console
– Click Create Project. Enter Project name & click Create.
– Note the Project Number on top of the page.
– Click API & Auth on left panel. Click API.
– Scroll down and turn-on Google Messaging for Android
– Click credentials and click “Create new key”. Click server key. Click create
-Copy API key in the Public API access
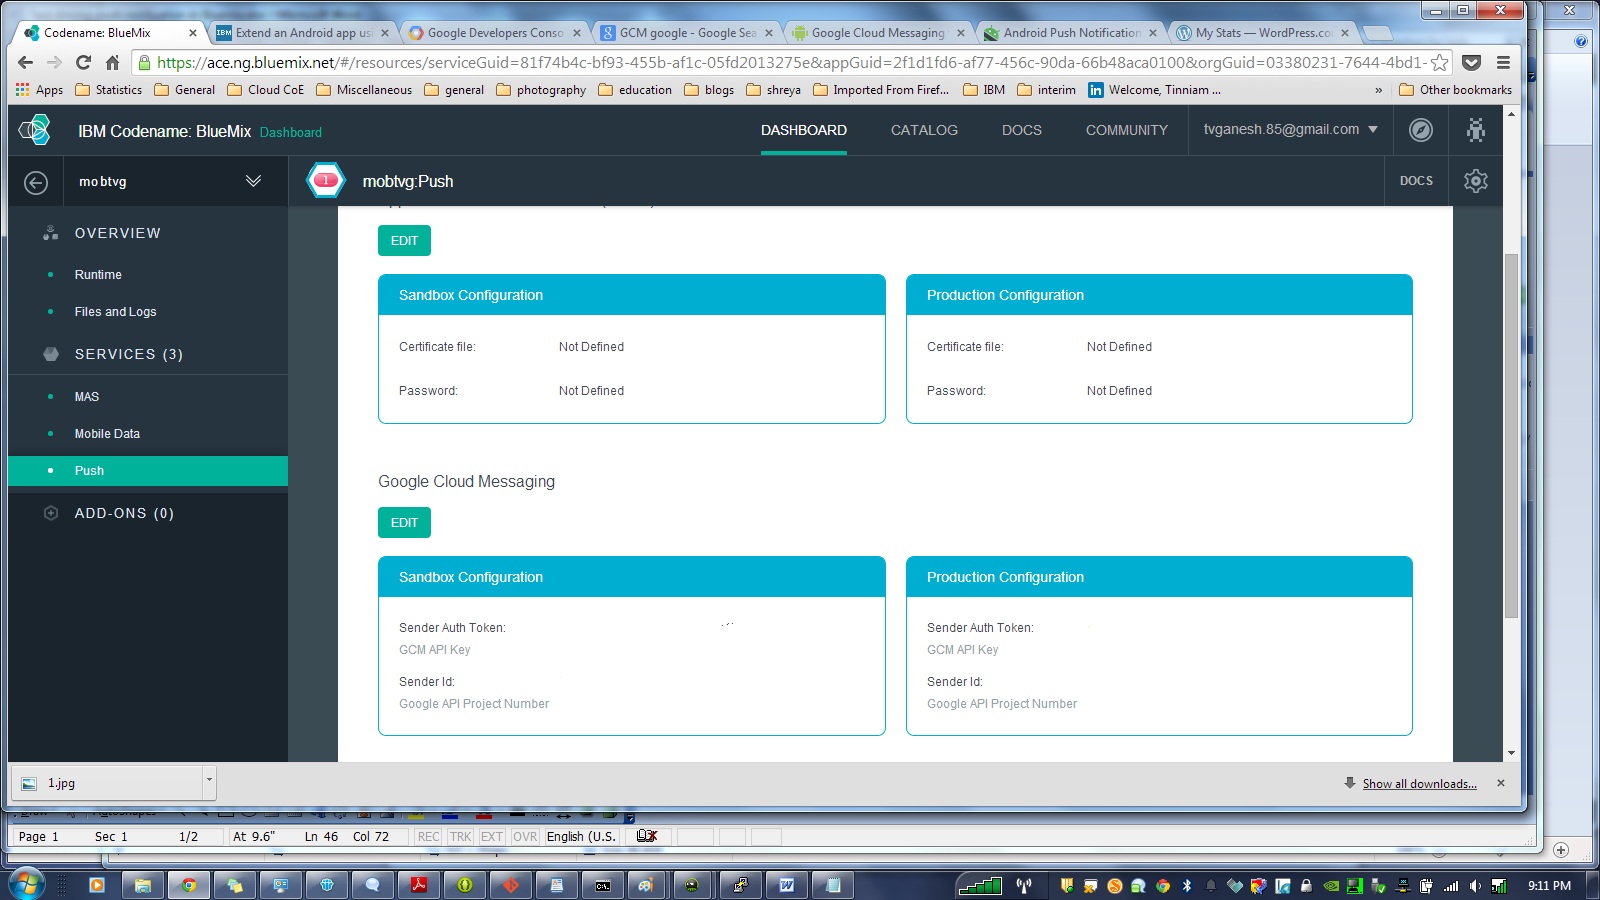
Now go the Bluemix dashboard and click your application. Click the Push module. In the Configuration tab, scroll down to Google Cloud Messaging and click ‘Edit’
Enter the Google API Project Number & GCM API key for both the Sandbox & Production configuration and click Save.
b) In Eclipse click Windows->Android SDK manager. Scroll down to the bottom and under Extras select Google Play services. Click install. Once the installation is successful import the project as follows File-Import->Android->Existing Android code into Workspace. Click Next. In the next screen Browse to the path where your ADT bundle is installed and choose the folder
<ADT-Bundle>\ sdk\extras\google\google_play_services
and Click Ok. Also check ‘Copy project into workspace’. This will copy.

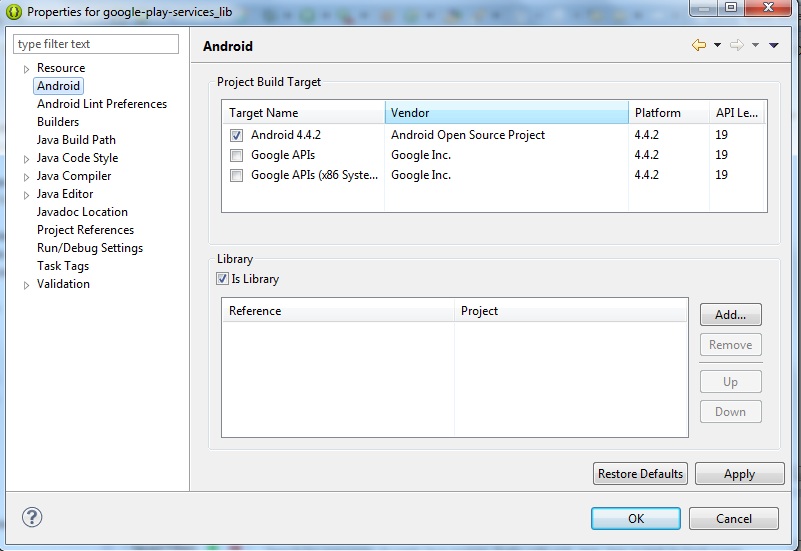
Now build the Google Play Services Project. To do this the project. Click Project->Properties->Android and make sure that you select ‘Is library project’ and then click build.
Add a reference to the Google Play services in the Androidmanifest.xml
<meta-data
android:name=”com.google.android.gms.version”
android:value=”@integer/google_play_services_version” />
c) Make all the code changes given in Step 4 of “Extend an Android app using the Push cloud service.
d) In MainActivity.java make sure you change the app_name to the name of your app for e.g
public static final String CLASS_NAME = “MainActivity”;
public static final String APP_NAME = “mobtvg“;
Also ensure that under assets folder you have populated the Application ID in the bluemix.properties file
applicationID=<Application ID from Bluemix>
d) Add ibmcloudcode.jar, ibmpush.jar, android-support-v4.jar (from <Android_SDK_Location>/extras/android/support/v4)
e) Now the Mobile Push project need to include this library project. To do this select your Mobile App project. Click Project->Properties->Android. Click Add and select google-play-services-lib. Note: Make sure “Is library project” is unchecked otherwise you are in for a lot of grief.

f) Now you need to make changes to the Node.js application to push any changes from the server to all registered devices. The code for this is in bluelist-push-node. Note; Making changes through the GUI results in an error that “manifest.yml is not in root node”. So I suggest that you take the ‘cf’ route as follows.
– Clone the code using Git
git clone https://hub.jazz.net/git/mobilecloud/bluelist-push
Go to bluelist-push-node folder
i) Open the app.js with your favorite editor and enter the Application ID of your Bluemix application
//Data Values
var values = {
version:”0.3.1″,
//change this to the actual application id of your mobile backend starter
appID : “<APPLICATION ID>”,
host : “https://mobile.ng.bluemix.net”
}
ii) Open manifest.yml and change host name & name to the name of your application for e.g.
host: mobtvg
disk: 1024M
name: mobtvg
command: node app.js
path: .
domain: ng.bluemix.net
mem: 128M
instances: 1
iii) Once the changes are complete, open a command propmpt and login into Bluemix using ‘cf’ as follows
– cd to the directory in which Node.js & manifest.yml exist, Do
cf login – a http://api.ng.bluemix.net
cf push mobtvg -p . -m 512M
(Note the changes are pushed to the mobile cloud app on Bluemix)
This will run through and finally give the status that the app is running successfully.
f) Now that all changes are complete the Mobile Cloud with Push can be tested..
g) Click Window->Android Virtual Device Manager. Click the Device definitions. You choose Google Nexus, Nexus 7. Click Create AVD.
Note: Make sure you choose Google API Level Y and not Android x.x.x API Y.

Let the AVD come up and display the current items in the grocery list.
h) Login to Bluemix. Click Push and select the Notifications tab and enter a test message for e.g. “This is a notification from Bluemix” and click send.
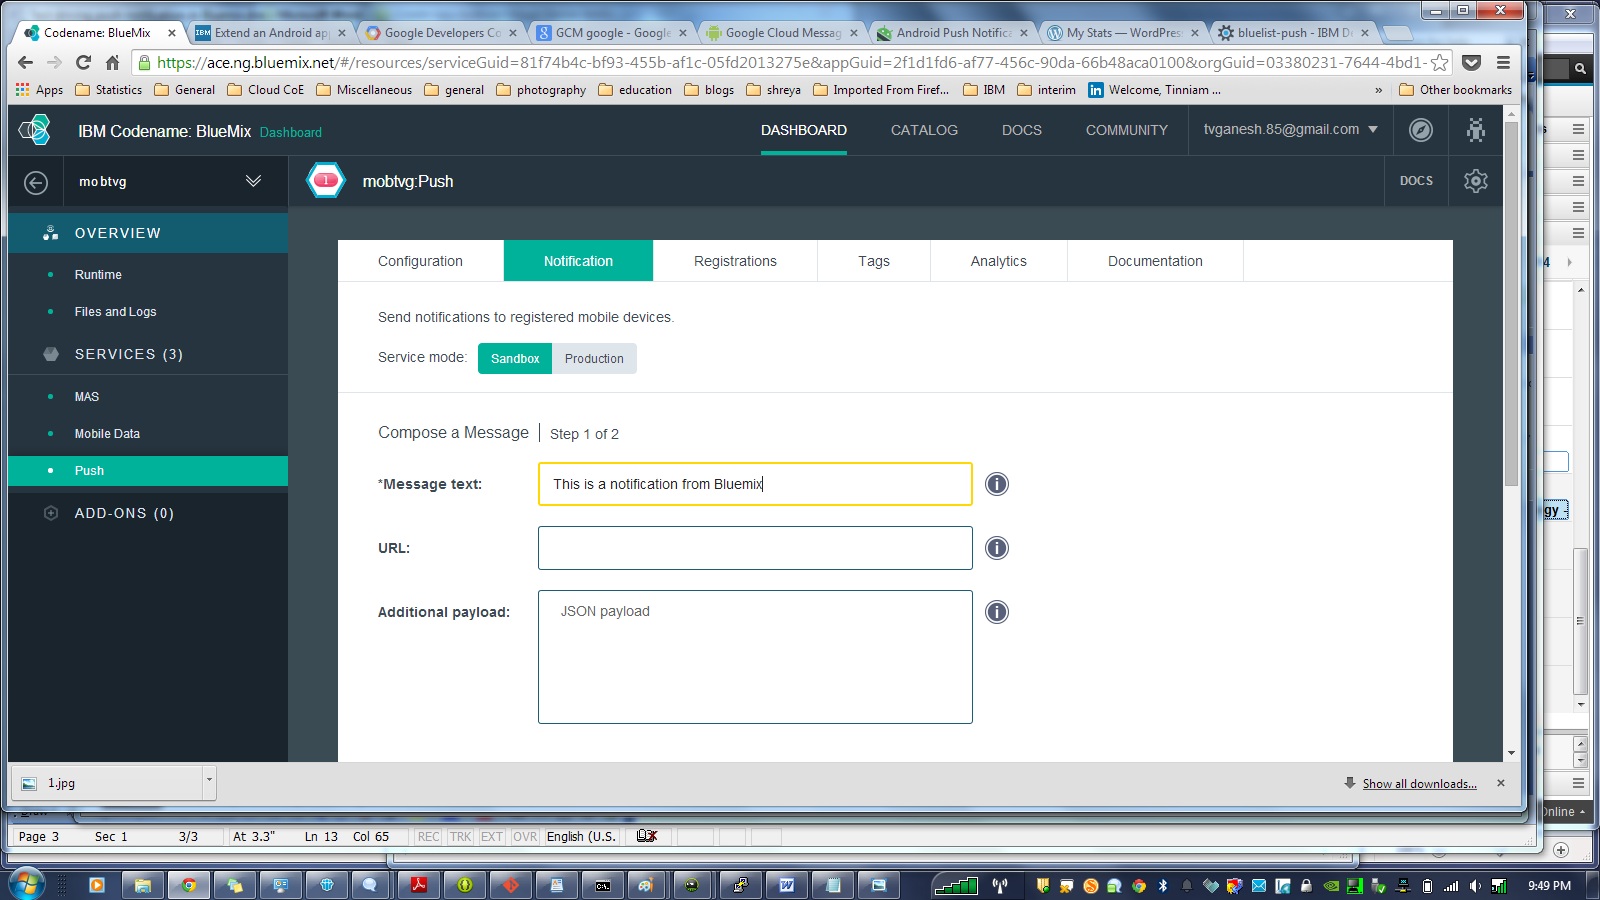
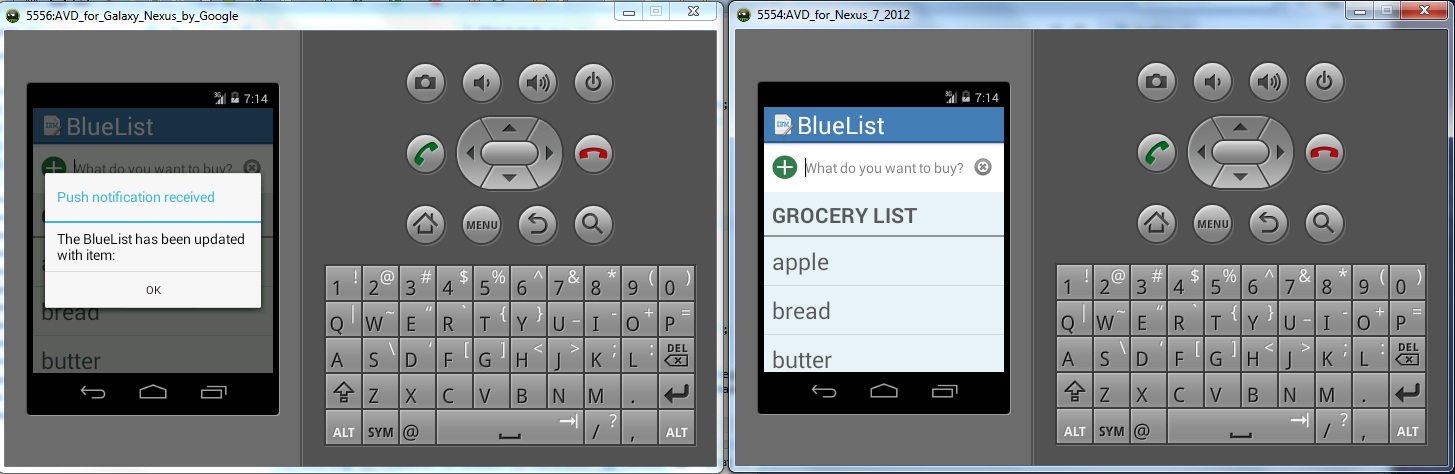
This will result in a Push Notification to be sent to the AVD. You should see this popup on you AVD as shown below

i) Add another AVD through Windows-Android Virtual Device manager. While one AVD is running go to Run->Run Configurations->Target Device and choose the newly created AVD.
j) This will start a second AVD which will refresh with the contents of the grocery list. Now adda new item in one of AVD devices. This will result in a Push notification to the other device that the Bluelist has been updated.
There you have it.
1) A mobile cloud applications in which changes persist in the cloud and are refreshed each time the Android device is restarted.
2) A Push notification that is sent to all registered devices whenever there is a change to the list.
Disclaimer: This article represents the author’s viewpoint only and doesn’t necessarily represent IBM’s positions, strategies or opinions


Reblogged this on Jari65 Blog.
LikeLike
Hey if you can, can you write about this app on kickstarter. Maybe help it get some people to donate. This app will be available for both android and apple. So if you can, can you please blog about it.
LikeLike