Into the Telecom vortex

“Ten little Indian boys went out to dine,
One choked his little self and then there were nine
Nine little Indian boys sat up very late;
One overslept himself and then there were eight…”

From the poem “Ten Little Indians”

a

You don’t need to be particularly observant to notice that the telecom landscape over the last decade and a half is full of dead organizations, bloodshed and gore. Organizations have been slain by ruthless times and bigger ones have devoured the weaker, fallen ones. Telecom titans have vanished, giants have been reduced to dwarfs.

Some telecom companies have merged in a deadly embrace trying to beat the market forces only to capitulate to its inexorable death march.

The period from the early 1980s to the late 1990’s were the glorious periods for telecommunication. Digital switches (1972-1982), ISDN (1988), international calling, trunk protocols, mobile (~1991), 2G, 2.5G, and 3G moved in succession, one after another.

Advancement came after advancement. The future had never looked so bright for telecom companies.

The late 1990’s were heady years, not just for telecom companies, but to all technology companies. Stock prices soared. Many stocks were over-valued.  This was mainly due to what was described as the ‘irrational exuberance’ of the stock market.

Lucent, Alcatel, Ericsson, Nortel Networks, Nokia, Siemens, Telecordia all ruled supreme.

1997-2000. then the inevitable happened. There was the infamous dot-com bust of the 2000 which sent reduced many technology stocks to penny stocks. Telecom company stocks went into a major tail spin.  Stock prices of telecom organizations plummeted. This situation, many felt, was further exacerbated by the fact that nothing important or earth shattering was forth-coming from the telecom. In other words, there was no ‘killer app’ from the telecommunication domain.

From 2000 onwards 3G, HSDPA, LTE etc. have all come and gone by. But the markets were largely unimpressed. This was also the period of the downward slide for telecom. The last decade and a half has been extra-ordinarily violent. Technology units of dying organizations have been cannibalized by the more successful ones.

Stellar organizations collapsed, others transformed into ‘white dwarfs’, still others shattered with the ferocity of a super nova.

Here is a short recap of the major events.

  • 2006 – After a couple of unsuccessful attempts Alcatel and Lucent finally decide to merge
  • 2006 – Nokia marries Siemens in a 20 billion Euro deal. N
  • 2009-10 – Ericsson purchases Nortel’s CDMA and LTE business for $1.13 billion
  • 2009-10 – Nortel implodes
  • 2010 – Motorola sells networking unit to Nokia for $1.2 Billion
  • 2011 – Internet giant Google mops up Motorola’s handset division for $12.5 billion, largely for the patents
  • 2012 – Ericsson closes a deal with Telcordia for $1.15 billion
  • 2013 – Nokia sells its handset division to Microsoft after facing a serious beating from smartphones
  • 2015 – Nokia agrees to a $16.6 billion takeover of Alcatel Lucent

And so the story continues like the rhyme in Agatha Christie’s mystery novel

And then there were none

Ten little Indian boys went out to dine,                                                                                                                
One choked his little self and then there were nine…”

The Telecom companies continue their search for the elusive ‘killer app’ as progress comes in small increments – 3G, 3.5G, 3.75G, 4G, and 5G etc.

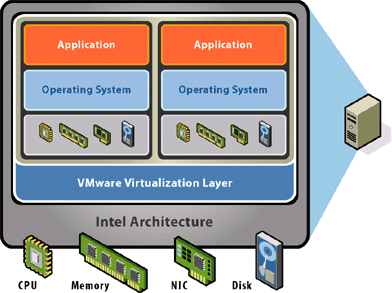
Personally I think the future of Telecom companies, lies in its ability to embrace the latest technologies of Cloud Computing, Big Data, Software Defined Networks, and Software Defined Datacenters and re-invent themselves. Rather than looking for some elusive ‘killer app’ they have to re-enter the technology scene with a Big Bang

As I referred to in one of my earlier posts “Architecting a cloud Based IP Multimedia System” the proverbial pot at the end of the rainbow may be in

  1. Virtualizing IP Multimedia Switches (IMS) namely the CSCFs (P-CSCF, S-CSCF, I-CSCF etc.),
  2. Using the features of the cloud like Software Defined Storage (SDS) , Load balancers and auto-scaling to elastically scale-up or scale down the CSCF instances to handle varying ‘call traffic’
  3. Having equipment manufacturers (Nokia, Ericsson, and Huawei) will have to use innovating pricing models with the carriers like AT&T, MCI, Airtel or Vodafone. Instead of a one-time cost for hardware and software, the equipment manufacturers will need to charge based on usage or call traffic (utility charging). This will be a win-win for both the equipment manufacturer and carrier
  4. Using SDN to provide the necessary virtualized pipes between users with the necessary policies for advanced services like video-chat, white-boarding, real-time gaming etc.
  5. Using Big Data and Hadoop to analyze Call Detail Records (CDRs) and provide advanced services to customers like differential rates for calls etc

Clearly there will be challenges in this virtualized view of things. Telecom equipment is renowned for its 5 9’s availability. The challenge will be achieving this resiliency, high availability and fault-tolerance with cloud servers. How can WAN latencies be mitigated? How to can SDN provide the QoS required for voice, video and data traffic in IMS?

IMS has many interesting services where video calls from laptops can be transferred as data calls to mobile phones and vice versa, from mobile networks to WiFi  and so on.

Many hurdles will have to be crossed. But this is, in my opinion, will be the path forward.

While the last decade and a half have been bad for the telecom industry, I personally feel we are on the verge on the next big breakthrough in telecom in the next year or two. Telecom will rise like the phoenix from its ashes in the next couple of years

Also see
1. A crime map of India in R: Crimes against women
2.  What’s up Watson? Using IBM Watson’s QAAPI with Bluemix, NodeExpress – Part 1
3.  Bend it like Bluemix, MongoDB with autoscaling – Part 2
4. Informed choices through Machine Learning : Analyzing Kohli, Tendulkar and Dravid
5. Thinking Web Scale (TWS-3): Map-Reduce – Bring compute to data
6. Deblurring with OpenCV:Weiner filter reloaded

Revisiting Whats up, Watson – Using Watson’s Question and Answer with Bluemix – Part 2

In this I revisit the Bluemix app based on Watson’s Question and Answer service which I had posted in my earlier article “Whats up Watson? Using IBM Watson with Bluemix, NodeExpress – Part 1“. In this post I removed some redundant code and also added some additional checks to the Jade templates to handle responses to “focusless”  questions viz. Am I…? or “Is X contagious?”

You can run the app at Whatsup Watson?

The code can be forked and cloned from Devops at Whatsup

The code is also available at GitHub at Whatsup

The section below briefly describes the details of the implementation of the WhatsupWatson app

A) app.js

In the app.js module the VCAP environment is parsed to get the credentials to use the Watson Question and Answer service as shown below

if (process.env.VCAP_SERVICES) {
  var VCAP_SERVICES = JSON.parse(process.env.VCAP_SERVICES);
  // retrieve the credential information from VCAP_SERVICES for Watson QAAPI
  hostname   = VCAP_SERVICES["question_and_answer"][0].name;               
  passwd = VCAP_SERVICES["question_and_answer"][0].credentials.password; 
  username = VCAP_SERVICES["question_and_answer"][0].credentials.username; 
  watson_url = VCAP_SERVICES["question_and_answer"][0].credentials.url;
}

There different ways of asking Watson questions. Watson’s response will vary depending on the options and parameters that are used to POST the question to Watson. This app uses a route for each ‘question type’ and option. These are

a. Simple Synchronous Query: Post a simple synchronous query to Watson

This is the simplest query that we can pose to Watson. Here we need to just include the text of the question and the also a Sync Timeout. The Sync Timeout denotes the time client will wait for responses from the Watson service

// Ask Watson a simple synchronous query
app.get('/question',question.list);
app.post('/simplesync',simplesync.list);

b. Evidence based question: Ask Watson to respond to evidence given to it

Ask Watson for responses based on evidence given like medical conditions etc.

// Ask Watson for responses based on evidence provided
app.get('/evidence',evidence.list);
app.post('/evidencereq',evidencereq.list);

c. Request for a specified set of answers to a question: Ask Watson to give a specified number of responses to a question

// Ask Watson to provide specified number of responses to a query
app.get('/items',items.list);
app.post('/itemsreq',itemsreq.list);

d. Get a formatted response to a question: Ask Watson to format the response to the question

// Get a formatted response from Watson for a query
app.get('/format',format.list);
app.post('/formatreq',formatreq.list);

To get started with Watson we would need to connect the Bluemix app to the Watson’s QAAPI as a service by parsing the environment variable. This is shown below

B) simplesync.js


The code in simplesync.js, evidencereq.js, itemsreq.js,formatreq.js are similar. The modules construct the question in the format required. The details of the implementation of simplesync.js is included below a. The Watson’s corpus will be set to ‘healthcare’

parts = url.parse(watson_url +'/v1/question/healthcare');

b. The POST headers are set

// Set the required headers for posting the REST query to Watson
headers = {'Content-Type'  :'application/json',
                  'X-synctimeout' : syncTimeout,
                  'Authorization' : "Basic " + new Buffer(username+":"+passwd).toString("base64")};

c. The POST request options are set

// Create the request options to POST our question to Watson
var options = {host: parts.hostname,
port: 443,
path: parts.pathname,
method: 'POST',
headers: headers,
rejectUnauthorized: false, // ignore certificates
requestCert: true,
agent: false};

The question that is to be asked of Watson needs to be formatted appropriately based on the input received in the appropriate form (for e.g. simplesync.jade)

// Get the values from the form
var syncTimeout = req.body.timeout;
var query = req.body.query;
// create the Question text to ask Watson
var question = {question : {questionText :query }};
var evidence = {"evidenceRequest":{"items":1,"profile":"yes"}};
// Set the POST body and send to Watson
req.write(JSON.stringify(question));
req.write("\n\n");
req.end();

Now you POST the Question to Watson and receive the stream of response using Node.js’ .on(‘data’,) & .on(‘end’) shown below

var req = https.request(options, function(result) {
result.setEncoding('utf-8');
// Retrieve and return the result back to the client
result.on(“data”, function(chunk) {
output += chunk;
});

result.on('end', function(chunk) {		  
           var answers = JSON.parse(output);
			      results = answers[0];
			      res.render(
					 'answer', {
                      "results":results
                                        
			   });
			
});

The results are parsed and formatted displayed using Jade. For the Jade templates I have used a combination of Jade and in-line HTML tags.

Included below is the part of the jade template with in-line HTML tagging

c) answer.jade

mplementation details of WhatsupWatsonapp

The section below briefly describes the details of the implementation of the WhatsupWatson app

A) app.js

In the app.js module the VCAP environment is parsed to get the credentials to use the Watson Question and Answer service as shown below

if (process.env.VCAP_SERVICES) {
  var VCAP_SERVICES = JSON.parse(process.env.VCAP_SERVICES);
  // retrieve the credential information from VCAP_SERVICES for Watson QAAPI
  hostname   = VCAP_SERVICES["question_and_answer"][0].name;               
  passwd = VCAP_SERVICES["question_and_answer"][0].credentials.password; 
  username = VCAP_SERVICES["question_and_answer"][0].credentials.username; 
  watson_url = VCAP_SERVICES["question_and_answer"][0].credentials.url;
}

There different ways of asking Watson questions. Watson’s response will vary depending on the options and parameters that are used to POST the question to Watson. This app uses a route for each ‘question type’ and option. These are

a. Simple Synchronous Query: Post a simple synchronous query to Watson

This is the simplest query that we can pose to Watson. Here we need to just include the text of the question and the also a Sync Timeout. The Sync Timeout denotes the time client will wait for responses from the Watson service

// Ask Watson a simple synchronous query
app.get('/question',question.list);
app.post('/simplesync',simplesync.list);

b. Evidence based question: Ask Watson to respond to evidence given to it

Ask Watson for responses based on evidence given like medical conditions etc.

// Ask Watson for responses based on evidence provided
app.get('/evidence',evidence.list);
app.post('/evidencereq',evidencereq.list);

c. Request for a specified set of answers to a question: Ask Watson to give a specified number of responses to a question

// Ask Watson to provide specified number of responses to a query
app.get('/items',items.list);
app.post('/itemsreq',itemsreq.list);

d. Get a formatted response to a question: Ask Watson to format the response to the question

// Get a formatted response from Watson for a query
app.get('/format',format.list);
app.post('/formatreq',formatreq.list);

To get started with Watson we would need to connect the Bluemix app to the Watson’s QAAPI as a service by parsing the environment variable. This is shown below

B) simplesync.js


The code in simplesync.js, evidencereq.js, itemsreq.js,formatreq.js are similar. The modules construct the question in the format required. The details of the implementation of simplesync.js is included below a. The Watson’s corpus will be set to ‘healthcare’

parts = url.parse(watson_url +'/v1/question/healthcare');

b. The POST headers are set

// Set the required headers for posting the REST query to Watson
headers = {'Content-Type'  :'application/json',
                  'X-synctimeout' : syncTimeout,
                  'Authorization' : "Basic " + new Buffer(username+":"+passwd).toString("base64")};

c. The POST request options are set

// Create the request options to POST our question to Watson
var options = {host: parts.hostname,
port: 443,
path: parts.pathname,
method: 'POST',
headers: headers,
rejectUnauthorized: false, // ignore certificates
requestCert: true,
agent: false};

The question that is to be asked of Watson needs to be formatted appropriately based on the input received in the appropriate form (for e.g. simplesync.jade)

// Get the values from the form
var syncTimeout = req.body.timeout;
var query = req.body.query;
// create the Question text to ask Watson
var question = {question : {questionText :query }};
var evidence = {"evidenceRequest":{"items":1,"profile":"yes"}};
// Set the POST body and send to Watson
req.write(JSON.stringify(question));
req.write("\n\n");
req.end();

Now you POST the Question to Watson and receive the stream of response using Node.js’ .on(‘data’,) & .on(‘end’) shown below

var req = https.request(options, function(result) {
result.setEncoding('utf-8');
// Retrieve and return the result back to the client
result.on(“data”, function(chunk) {
output += chunk;
});

result.on('end', function(chunk) {		  
           var answers = JSON.parse(output);
			      results = answers[0];
			      res.render(
					 'answer', {
                      "results":results
                                        
			   });
			
});

The results are parsed and formatted displayed using Jade. For the Jade templates I have used a combination of Jade and in-line HTML tags.

Included below is the part of the jade template with in-line HTML tagging

c) answer.jade

if results.question.qclasslist
    for result in results.question.qclasslist
      p <font color="blueviolet">  Value   = <font color="black "> #{result.value} </font> 
  if results.question.focuslist
    p <font color="blueviolet">  Focuslist  </font> = <font color="black "> #{results.question.focuslist[0].value} </font>
  if latlist
    p <font color="blueviolet">  Latlist  </font> = <font color="black "> #{results.question.latlist[0].value} </font>

Disclaimer: This article represents the author’s viewpoint only and doesn’t necessarily represent IBM’s positions, strategies or opinions

Find me on Google+

What’s up Watson? Using IBM Watson’s QAAPI with Bluemix, NodeExpress – Part 1

Published in IBM developerWorks ‘Whats up Watson? Using Watson QAAPI with Bluemix and NodeExpress

In this post I take the famed IBM Watson through the paces (yes, that’s right!, this post is about  using the same  IBM  Watson which trounced 2 human Jeopardy titans in a classic duel in 2011).  IBM’s Watson (see  What is Watson?) is capable of understanding the nuances of the English language and heralds a new era in the domain of cognitive computing. IBM Bluemix now includes 8 services from Watson ranging from Concept Expansion, Language Identification, Machine Translation, Question-Answer etc. For more information on Watson’s QAAPI and the many services that have been included in Bluemix please see Watson Services.

In this article I create an application on IBM Bluemix and use Watson’s QAAPI (Question-Answer API) as a service to the Bluemix application. For the application I have used NodeExpress to create a Webserver and post the REST queries to Watson.  Jade is used format the results of Watson’s Response.

In this current release of Bluemix Watson comes with a corpus of medical facts. In other words Watson has been made to ingest medical documents in multiple formats (doc, pdf, html, text  etc) and the user can pose medical questions to Dr.Watson. In its current avatar, its medical diet consisted of dishes from (CDC Health Topics, National Heart, Lung, and Blood Institute (NHLBI) National Institute of Arthritis and Musculoskeletal and Skin Diseases (NIAMS), National Institute of Diabetes and Digestive and Kidney Diseases (NIDDK), National Institute of Neurological Disorders and Stroke (NINDS), Cancer.gov (physician data query) etc.)

Try out my Watson app  on Bluemix here –  Whats up Watson?

To get down to Watson QAAPI business with Bluemix app you can fork the code from Devops at whatsup. This can then be downloaded to your local machine. You can also clone the code from GitHub at whatsup

  1. To get started go to the directory where you have cloned the code for Whatsup app

2.Push the app to Bluemix using Cloud Foundry’s ‘cf’ commands as shown below

cf login -a https://api.ng.bluemix.net

3. Next push the app to Bluemix
cf push whatsup –p . –m 512M

In the Bluemix dashboard you should see ‘whatsup’ app running. Now click ‘Add Service’ and under Watson add ‘Question Answer’

1

Add Qatson QAAPI

2

You will be prompted with ‘Restage Application’. Click ‘Ok’. Once you have the app running you should be able to get started with Doc Watson.

The code for this Bluemix app with QAAPI as a Service is based on the following article Examples using the Question and Answer API

  1. Here’s a look at the code for the Bluemix & Watson app.

In this Bluemix app I show the different types of Questions we can ask Watson and the responses we get from it. The app has a route for each of the different types of questions and options

a. Simple Synchronous Query: Post a simple synchronous query to Watson
This is the simplest query that we can pose to Watson. Here we need to just include the text of the question and the also a Sync Timeout. The Sync Timeout denotes the time client will wait for responses from the Watson service
// Ask Watson a simple synchronous query

app.get('/question',question.list);
app.post('/simplesync',simplesync.list);

b. Evidence based question: Ask Watson to respond to evidence given to it
Ask Watson for responses based on evidence given like medical conditions etc. This would be a used for diagnostic purposes I would presume.
// Ask Watson for responses based on evidence provided
app.get('/evidence',evidence.list);
app.post('/evidencereq',evidencereq.list);

c. Request for a specified set of answers to a question: Ask Dr. Watson to give a specified number of responses to a question
// Ask Watson to provide specified number of responses to a query
app.get('/items',items.list);
app.post('/itemsreq',itemsreq.list);

d. Get a formatted response to a question: Ask Dr. Watson to format the response to the question
// Get a formatted response from Watson for a query
app.get('/format',format.list);
app.post('/formatreq',formatreq.list);

  1. To get started with Watson we would need to connect the Bluemix app to the Watson’s QAAPI as a service by parsing the environment variable. This is shown below

//Get the VCAP environment variables to connect Watson service to the Bluemix application

question.js
o o o
if (process.env.VCAP_SERVICES) {
var VCAP_SERVICES = JSON.parse(process.env.VCAP_SERVICES);
// retrieve the credential information from VCAP_SERVICES for Watson QAAPI
var hostname   = VCAP_SERVICES["Watson QAAPI-0.1"][0].name;
var passwd = VCAP_SERVICES["Watson QAAPI-0.1"][0].credentials.password;
var userid = VCAP_SERVICES["Watson QAAPI-0.1"][0].credentials.userid;
var watson_url = VCAP_SERVICES["Watson QAAPI-0.1"][0].credentials.url;

Next we need to format the header for the POST request

var parts = url.parse(watson_url);
// Create the request options to POST our question to Watson
var options = {host: parts.hostname,
port: 443,
path: parts.pathname,
method: 'POST',
headers: headers,
rejectUnauthorized: false, // ignore certificates
requestCert: true,
agent: false};

The question that is to be asked of Watson needs to be formatted appropriately based on the input received in the appropriate form (for e.g. simplesync.jade)

question.js
// Get the values from the form
var syncTimeout = req.body.timeout;
var query = req.body.query;
// create the Question text to ask Watson
var question = {question : {questionText :query }};
var evidence = {"evidenceRequest":{"items":1,"profile":"yes"}};
// Set the POST body and send to Watson
req.write(JSON.stringify(question));
req.write("\n\n");
req.end();

Now you POST the Question to Dr. Watson and receive the stream of response using Node.js’ .on(‘data’,) & .on(‘end’) shown below

question.js
…..
      var req = https.request(options, function(result) {
// Retrieve and return the result back to the client
result.on(“data”, function(chunk) {
output += chunk;
});

result.on('end', function(chunk) {
// Capture Watson's response in output. Parse Watson's answer for the fields
var results = JSON.parse(output);
res.render(
'answer', {
"results":results
});
});
});

The results are parsed and formatted displayed using Jade. For the Jade templates I have used a combination of Jade and inline HTML tags (Jade can occasionally be very stubborn and make you sweat quite a bit. So I took the easier route of inline HTML tagging. In a later post I will try out CSS stylesheets to format the response.)

Included below is the part of the jade template with inline HTML tagging

Answer.jade
o o o
<h2 style="color:blueviolet">  Question Details </style> </h2>
for result in results.question.qclasslist
p <font color="blueviolet">  Value   = <font color="black "> #{result.value} </font>
p <font color="blueviolet">  Focuslist  </font> = <font color="black "> #{results.question.focuslist[0].value} </font>
// The 'How' query's response does not include latlist. Hence conditional added.
if latlist
p <font color="blueviolet">  Latlist  </font> = <font color="black "> #{results.question.latlist[0].value} </font>

o o o

Now that the code is all set you can fire the Watson. To do this click on the route

3

Click the route whatsup.mybluemix.net and ‘Lo and behold’ you should see Watson ready and raring to go.

4

As the display shows there are 4 different Question-Answer options that there is for Watson QAAPI

Simple Synchronous Question-Answer
This option is the simplest option. Here we need to just include the text of the question and the also a Sync Timeout. The question can be any medical related question as Watson in its current Bluemix avatar has a medical corpus

For e.g.1) What is carotid artery disease?

2) What is the difference between hepatitis A and hepatitis B etc.

The Sync Timeout parameter specifies the number of seconds the QAAPI client will wait for the streaming response from Watson. An example question and Watson’s response are included below
5
;

When we click Submit Watson spews out the following response

6

Evidence based response:

In this mode of operation, questions can be posed to Watson based on observed evidence. Watson will output all relevant information based on the evidence provided. As seen in the output Watson provides a “confidence factor” for each of its response

7

Watson gives response with appropriate confidence values based on the given evidence

8

Question with specified number of responses
In this option we can ask Watson to provide us with at least ‘n’ items in its response. If it cannot provide as many items it will give an error notification

11

This will bring up the following screen where the question asked is “What is the treatment for Down’s syndrome?” and Items as 3.
9

Watson gives 3 items in the response as shown below
10

Formatted Response: Here Watson gives a formatted response to question asked. Since I had already formatted the response using Jade it does not do extra formatting as seen in the screen shot.
12

Updated synonym based response. In this response we can change the synonym list based on which Watson will search its medical corpus and modify its response. The synonym list for the the question “What is fever?” is shown below. We can turn off synonyms by setting to ‘false’ and possibly adding other synonyms for the search
13

This part of the code has not been included in this post and is left as an exercise to the reader 🙂

As mentioned before you can fork and clone the code from IBM devops at whatsup or clone from GitHub at whatsup

There are many sections to Watson’s answer which cannot be included in this post as the amount of information is large and really needs to be pared to pick out important details. I am including small sections from each part of Watson’s response below to the question “How is carotid artery disease treated/”

I will follow up this post with another post where I will take a closer look at Watson’s response which has many parts to it
namely

– Question Details
14

– Evidence list
15

– Synonym list
16

– Answers

17

– Error notifications
18

There you have it.  Go ahead and get all your medical questions answered by Watson.

Disclaimer: This article represents the author’s viewpoint only and doesn’t necessarily represent IBM’s positions, strategies or opinions

Other posts on Bluemix

1. Brewing a potion with Bluemix, PostgreSQL & Node.js in the cloud
2. A Bluemix recipe with MongoDB and Node.js
3. A Cloud Medley with IBM’s Bluemix, Cloudant and Node.js
4.  Bend it like Bluemix, MongoDB with autoscaling – Part 1

You may also find the following interesting
1. Informed choices through Machine Learning : Analyzing Kohli, Tendulkar and Dravid
2. Informed choices through Machine Learning-2: Pitting together Kumble, Kapil,
3. A crime map of India in R: Crimes against women
4. Analyzing cricket’s batting legends – Through the mirage with R


Find me on Google+

Test driving Push notification in Bluemix

This post is a continuation of my earlier post ‘Getting started with mobile cloud in Bluemix‘. Here I take a test drive of the push service that Bluemix offers based on the article “Extend an Android app using the Push cloud service” from developerWorks.

This post assumes that you have already completed the changes from my earlier post for the mobile cloud. If you haven’t,  you could clone the code from “mobile data” which is the official IBM version of this app and includes all the changes needed for persisting data in the cloud through their Android.

The Mobile Cloud App I created on Bluemix is “mobtvg“. The main steps to have Push notification service using Bluemix are

  1. GCM services : Get Google API Project number  & GCM API Key
  2. Include the Google Play services library project
  3. Add the jar files to enable Push service
  4. Modify the server side Node.js file to send push notifications to all registered devices
  5. Make necessary code changes
  6. Run the application and test for notification

Here are more details on the above steps

a) GCM services : Google Cloud Messaging for Android (GCM) is a service that allows you to send data from your server to your users’ Android-powered device, and also to receive messages from devices on the same connection. The 1st thing to do is get the Google API Project number & GCM API key.

– Click on Google Developer Console

– Click Create Project. Enter Project name & click Create.

– Note the Project Number on top of the page.

– Click API & Auth on left panel. Click API.

– Scroll down and turn-on Google Messaging for Android

–  Click credentials and click “Create new key”. Click server key. Click create

-Copy API key in the Public API access

Now go the Bluemix dashboard and click your application. Click the Push module. In the Configuration tab, scroll down to Google Cloud Messaging and  click ‘Edit’

Enter the Google API Project Number & GCM API key for both the Sandbox & Production configuration and click Save.

4
b) In Eclipse click Windows->Android SDK manager. Scroll down to the bottom and under Extras select Google Play services. Click install. Once the installation is successful import the project as follows File-Import->Android->Existing Android  code into Workspace. Click Next. In the next screen Browse to the path where your ADT bundle is installed and choose the folder

<ADT-Bundle>\ sdk\extras\google\google_play_services

and Click Ok. Also  check ‘Copy project into workspace’. This will copy.

3

Now build the Google Play Services Project. To do this the project. Click Project->Properties->Android and make sure that you select ‘Is library project’ and then click build.

5

Add a reference to the Google Play services in the Androidmanifest.xml

<meta-data

android:name=”com.google.android.gms.version”

android:value=”@integer/google_play_services_version” />

c) Make all the code changes given in Step 4 of “Extend an Android app using the Push cloud service.

d) In MainActivity.java make sure you change the app_name to the name of your app for e.g

public static final String CLASS_NAME = “MainActivity”;

public static final String APP_NAME = “mobtvg“;

Also ensure that under assets folder you have populated the Application ID in the bluemix.properties file

applicationID=<Application ID from Bluemix>

d) Add ibmcloudcode.jar, ibmpush.jar, android-support-v4.jar (from <Android_SDK_Location>/extras/android/support/v4)

e) Now the Mobile Push project need to include this library project. To do this select your Mobile App project. Click Project->Properties->Android. Click Add and select google-play-services-lib. Note: Make sure “Is library project” is unchecked otherwise you are in for a lot of grief.

8

f) Now you need to make changes to the Node.js application to push any changes from the server to all registered devices.  The code for this is in bluelist-push-node. Note; Making changes through the GUI results in an error that “manifest.yml is not in root node”. So I suggest that you take the ‘cf’ route as follows.

– Clone the code using Git

git clone https://hub.jazz.net/git/mobilecloud/bluelist-push

Go to bluelist-push-node folder

i) Open the app.js with your favorite editor and enter the Application ID of your Bluemix application

//Data Values

var values = {

version:”0.3.1″,

//change this to the actual application id of your mobile backend starter

appID : “<APPLICATION ID>”,

host : “https://mobile.ng.bluemix.net&#8221;

}

ii) Open manifest.yml and change host name & name to the name of your application for e.g.

host: mobtvg

disk: 1024M

name: mobtvg

command: node app.js

path: .

domain: ng.bluemix.net

mem: 128M

instances: 1

iii) Once the changes are complete, open a command propmpt and  login into Bluemix using ‘cf’ as follows

– cd to the directory in which Node.js & manifest.yml exist, Do

cf login – a http://api.ng.bluemix.net

cf push mobtvg -p . -m 512M

(Note the changes are pushed to the mobile cloud app on Bluemix)

This will run through and finally give the status that the app is running successfully.

f) Now that all changes are complete the Mobile Cloud with Push can be tested..

g) Click Window->Android Virtual Device Manager. Click the Device definitions. You choose Google Nexus, Nexus 7. Click Create AVD.

Note: Make sure you choose Google API Level Y and not Android x.x.x API Y.

6

Let the AVD come up and display the current items in the grocery list.

h) Login to Bluemix. Click Push and select the Notifications tab and enter a test message for e.g. “This is a notification from Bluemix” and click send.

7

This will result in a Push Notification to be sent to the AVD. You should see this popup on you AVD as shown below

1

i) Add another AVD through Windows-Android Virtual Device manager. While one AVD is running go to Run->Run Configurations->Target Device and choose the newly created AVD.

j) This will start a second AVD which will refresh with the contents of the grocery list. Now adda new item in one of AVD devices. This will result in a Push notification to the other device that the Bluelist has been updated.

2

There you have it.

1) A mobile cloud applications in which changes persist in the cloud and are refreshed each time the Android device is restarted.

2) A Push notification that is sent to all registered devices whenever there is a change to the list.

Disclaimer: This article represents the author’s viewpoint only and doesn’t necessarily represent IBM’s positions, strategies or opinions

Find me on Google+

Getting started with a Mobile Cloud app with Bluemix

This post gives the key steps to get going in building a Mobile Cloud application on IBM’s Bluemix. This post focuses on using the Android Platform for building the application. IBM Bluemix’es mobile cloud application includes under its hood mobile services like mobile application security, push and mobile data. A Node.js is also thrown in to provide server-side functions.

The Bluemix Mobile architecture is shown below

BuildingMobile


As in the previous post an existing Mobile cloud application IBM’s bluelist -base is cloned to get familiarity with the steps involved. The IBM’s bluelist-base app enables the user to maintain a grocery list that persists as mobile data in the cloud instance. To get started perform the following

1) Install ADT + Eclipse bundle from the aforementioned link

2) Unzip and install Eclipse and the ADT bundle

3) Make sure you have the Java JDK for Eclipse. If not install from the following site Java SE Development Kit 8 Downloads

4) Since we will be cloning an existing application and using Eclipse to make the changes we need to install EGit.

5) To do this open Eclipse and select Help-> Install New Software and type in http://download.eclipse.org/egit/updates in the Work with text field and hit enter. You should see the following

1

6) Once EGit is installed the IBM’s bluelist-base App can be cloned as follows

7) In Eclipse click File->Import->Git->Import from Git and click Next

8) Choose Clone URI and Click Next

9) Enter the URI for IBM’s bluelist-base. This shown below

2

10) This will download all the necessary source files and other Android related files and directories into the workspace.

11) After this perform the Steps 2 to Step 6 from the link given Build an Android app using the MobileData cloud service

12) After you make the necessary code changes you are good to go

13) Make sure you right-click and add all the necessary imports required (also Ctrl+Shift + O)

14) Build the Project and make sure that there are no errors

15) You are now ready to run the mobile cloud application. We need to run the mobile app on a Virtual simulator. This can be done as

a) In Eclipse click Window->Android Virtual Device Manager. Click the Device Definitions tab.

b) Choose Nexus 7 (Google) and Click Create AVD.
c) This will open a New Window. Set the following Skin->QVGA and Enter 100 MiB in SD Card size and click OK. This will add this as a AVD.

16) Now run the application.

17) This will bring up the AVD. This takes some time You should see the IBM bluelist showing up as one of the apps.

18) Click on IBM Bluelist. You can add grocery items. These items will persist even if you have to restart your application

3

19) The data is persisted in the IBM’s cloud. This can be checked by logging into BlueMix’es dashboard

4

20) Click the Mobile Data and the data entered in the AVD device will show up in Data Classes drop down.

5

21) The Analytics tab will give a graphical output of the API calls

6

So not the mobile app that is cloud enabled is ready.

Clearly the ability to build Android Apps with the data stored at a cloud opens up numerous possibilities for apps like Evernote, Pocket across several devices.

There you have your first Mobile Cloud App.

Watch this space!

Disclaimer: This article represents the author’s viewpoint only and doesn’t necessarily represent IBM’s positions, strategies or opinions

Find me on Google+

Get your feet wet with IBM Bluemix

This post provides the initial steps to get started on IBM’s Bluemix (currently in beta). Bluemix is open-standard, cloud based Platform-as-a-Service (PaaS) from IBM. Bluemix allows one to quickly put together mobile, web, Big Data, IoT applications. Bluemix is an implementation of IBM’s Open Cloud Architecture, Cloud Foundry which enables developers to rapidly build, deploy, and manage their cloud applications. The developers can tap into a growing ecosystem of available services and runtime frameworks.

Bluemix uses the Softlayer infrastructure to host the user applications. Clients/developers interact with Bluemix either with HTTP or REST as shown below
8

Here are the steps to get going on Bluemix

First things first

I would suggest that you get all the registrations and installations right away.

Bluemix dashboard– Get started by creating an account on Bluemix. This will provide you access to the Bluemix’s dashboard from which you can quickly create applications (mobile, Web, IoT, BigData) etc

Devops: Register for an account with Devops. Devops allows you to easily develop, deploy and track your code online. Devops also allows you to collaborate with others by forking code from their Git repositories

Cf Interface : Install the Command line interface ‘cf” to Bluemix. The ‘cf’ command interface is built with Google’s Go programming language. With ‘cf ‘you can login to Bluemix, create an application, add services and manage your application. You can also do this from the Bluemix’es dashboard.

Install Git: There are multiple ways to develop code for Bluemix. Git command line happens to be one of them, So it makes sense to have this installed. You can install this from this link https://hub.jazz.net/tutorials/clients#installing_git

Install Node.js:The application that this post discusses is based on a Node.js based application so it will help to have it installed. Node.js is a platform that enables building of fast, scalable network applications and created by Ryan Dahl.

Kicking off Bluemix : A good first application to get moving on in Bluemix is the already available Sentiment Analysis of Twitter. This application uses the Node.js ‘sentiment’ module to perform some basic sentiment analysis.

The quickest and most painless way to get started on Bluemix is to ‘fork’ the code for Sentiment Analysis from Devops.

1) Login to your Devops account. Click the following Sentiments link from Devops, in which I have created a slight modification to the sentiment analysis application. You can also clone the code from GitHub at sentiments.

2) Click the Edit Code button at the top. This will open the files and directories in this project (see picture below)

3) Next click the “Fork’ button on the panel on the left side. This will create a copy of the above code in your own repository (see picture below )

1

4) The Twitter sentiment analysis code is in app.js written in Node.js. You can make changes to the code as needed. I have made a few modifications to the code that I had forked. I added changes which adds a textual output of the Twitter sentiment

;

How to make code changes with Web IDE

5) To make code changes double click the app.js file. This will open up the code window. You can use the GUI based IDE to make the code changes and merge with the master branch, The steps are
a) Make the necessary changes and click the symbol shown

2

3. This will open a new window as shown below

3

4) Click the ‘Stage to change’ button.

5) This will move the changes to Staged. Click the ‘Commit’ button and enter the reason for the change and click the “Submit’

4

6) This will move the changes from ‘Staged’ to ‘Commits for master branch’

7) Now click ‘Push all’ and click ‘Ok’ in the Git Push popup window. This will merge the changes into the master branch.

8) Once this done click ‘Build & Deploy’ button

9) Your changes will transition from ‘Pending’ to ‘OK’. Now click the ‘Manage’ button. This will deploy the application with the latest changes on to Bluemix.

10) Do the following to populate the details for the parameters below  with a Twitter app that you create for your application

var tweeter = new twitter({
consumer_key:  <your API key>,
consumer_secret: <your API secret>,
access_token_key:<your access token >,
access_token_secret: <your access token secret>
});

11) To do this log into http://dev.twitter.com

12) Click My applications where your picture is displayed and then click Create application.

13) Enter the details for Name,Description & Website (can be any valid website) and then click Create Twitter application.. This will create the Twitter application.

1

14) Click the API tab. Scroll down to the bottom and click “Create my access token”.

15) This will generate the Access token & Access token secret. Enter all the details (API Key, API secret, Access Token, Access Token secret into app.js and push to the master branch before deploying on Bluemix


Code changes with Git command line

11) Incidentally the changes to code can also be made through the Git command shell as follows

a) git clone https://hub.jazz.net/git/tvganesh/sentiments

b) Modify the code using any editor and save the changes

c) Go the directory containing the files and do

git add *

d) git commit -m “Cosmetic” app.js

e) git push

This will push the changes to the git repository in the master branch

8) Click the ‘Build & deploy’ in the top right corner. You should see this

5

9) Click the ‘Manage’ button which will push the application onto the BlueMix

10) To test this application click the link next to ‘Routes’ . Enter a phrase that you would like to search and hit ‘Go’

6

You should see the application checking Twitter periodically for the tweets.

7

Thats it! You have built your first Bluemix application.

The ability to integrate Node.js into your cloud application allows one to easily create powerful applications.

Hasta la vista! I’ll be back!

Disclaimer: This article represents the author’s viewpoint only and doesn’t necessarily represent IBM’s positions, strategies or opinions

Find me on Google+

Dissecting the Cloud – Part 1

“The Cloud brings it with it the promise of utility-style computing and the ability to pay according to usage.

Cloud Computing provides elasticity or the ability to grow and shrink based on traffic patterns.

Cloud Computing does away with CAPEX and the need to buy infrastructure upfront and replaces it with OPEX model and so on”.

All this old news and has been repeated many times. But what exactly constitutes cloud computing? What brings about the above features? What are its building blocks of the cloud that enable one to realize the above?

This post tries to look deeper into the innards of the Cloud to determine what the cloud really is.

Before we get to this I would like to dwell on an analogy to understand the Cloud better.

Let us assume, Mr. A owns a large building of about 15,000 sq feet and about 100 feet tall. Let us assume that Mr. A wants to rent this building.

Now, assume that the door of this building opens to single, large room on the inside!

Mr. X comes to rent this building. If this was the case then poor Mr. X would have to pay through his nose, presumably, for the entire building even though his requirement would have been for a small room of about 600 x 600 feet. Imagine the waste of space. Moreover this would also have resulted in an enormous waste of electricity. Imagine the lighting needed. Also an inordinate amount of water would have to be utilized if this single, large room needed to be cleaned. The cost for all of this would have to be borne by Mr. X.

This is clearly not a pleasant state of affairs for either Mr. X or for the owner Mr. A of the building.

The solution to this is easy.  What Mr. A needs to do, is to partition the building into self-contained rooms (600 x 600 sq feet) with all the amenities. Each self-contained unit would need to have its own electricity and water meter.

Now Mr. A can rent rooms to different tenants on their need basis. This is a win-win situation both for Mr, A and Mr. X. The tenants only need to pay for the rooms they occupy and the electricity and water they consume.

This is exactly the principle behind cloud computing and is known as ‘virtualization’

There are 3 computing components that one must consider. CPU, Network and Storage. The below picture shows the virtualization of CPU,RAM, NIC (network card), Disk (storage)

Server-Virtualization-Logical-View

The Cloud is essentially made up of  anywhere between 100 servers to 100,000 servers. The servers are akin to the large building. Running a single OS and application(s) on the entire server is a waste of computing, storage and network resources.

Virtualization abstracts the hardware, storage and network through the use of software known as the ‘hypervisor’. On top of the hypervisor several ‘guest OSes’ can run. Applications can then run on these guest OSes.

Hence over the CPU (single, dual or multi-core) of the server,  multiple guest OS’es  can run each with its own set of applications

This is similar to partitioning the large CPU resource of the server into smaller units.

There are 3 main Virtualization technologies namely VMware, Citrix and MS Hyper-V

Here is a diagram showing the 3 main the virtualization technologies

thumb_server_virtualization_lrg

To be continued …


Find me on Google+

The Case for a Cloud Based IMS Solution

IP Multimedia Systems (IMS) has been in the wings for some time. There have been several deployments by the major equipment manufacturers, but IMS is simply not happening. The vision of IMS is truly grandiose. IMS envisages an all-IP core with several servers known as Call Session Control Function (CSCF) participating to setup, maintain and release call sessions.

In the 3GPP Release 5 Architecture IMS draws an architecture of Proxy CSCF (P-CSCF), Serving CSCF(S-CSCF), Interrogating CSCF(I-CSCF), Breakout CSCF(B-CSCF), Home Subscriber Server(HSS) and Application Servers (AS) acting in concert in setting up, maintaining and release media sessions. The main protocols used in IMS are SIP/SDP for managing media sessions which could be voice, data or video and DIAMETER for connecting to the HSS and the Application Servers.

IMS is also access agnostic and is capable of handling landline or wireless calls over multiple devices from the mobile, laptop, PDA, smartphones or tablet PCs. The application possibilities of IMS are endless from video calling, live multi-player games to video chatting and mobile handoffs of calls from mobile phones to laptop. Despite the numerous possibilities IMS has not made prime time. While IMS technology paints a grand picture it has somehow not caught on. IMS as a technology, holds a lot of promise but has remained just that – promising technology.

The technology has not made the inroads into people’s imaginations or turned into a money spinner for Operators. One of the reasons may be that Operators are averse to investing enormous amounts into new technology and turning their network upside down.

This article provides an innovative approach to introducing IMS in the network by taking advantage of the public cloud!

Since IMS is an all-IP network and the protocol between the CSCF servers is SIP/SDP over TCP IP it can be readily seen that IMS is a prime candidate for the public cloud. An IMS architecture that has to be deployed on the cloud would have several instances of P-CSCFs, S-CSCFs, B-CSCFs, HSS and ASes all sitting on the cloud. An architectural diagram is shown below.

Deploying the CSCFs on the public cloud has multiple benefits. For one it a cloud deployment will eliminate the upfront CAPEX costs for the Operator. The cost savings can be passed on to the consumers whose video, data or voice calls will be cheaper. Besides, the absence of CAPEX will provide better margins to the operator. Lower costs to the consumer and better margins for the Operator is truly an unbeatable combination.

Also the elasticity of the cloud can be taken advantage of by the operator who can start small and automatically scale as the user base grows.

Thus a cloud based IMS deployment is truly a great combination both for the subscriber, the operator and the equipment manufactures. The cloud’s elasticity will automatically provide for growth as the irresistibility of  IMSes high speed video applications catches public imagination.

If IMS as a technology needs to become common place then Operators should plan on deploying their IMS on the public cloud and reap the manifold benefits.

Please see my post for a more detailed view of the above post in “Architecting a cloud based IP Multimedia System (IMS)

A related post of relevance is “Adding the OpenFlow variable to the IMS equation“.

Find me on Google+

Cache-22

If you want performance you need to partition data. If you partition data you will not get performance! That sounded clever but is it true? Well, it can be if the architecture of your application is naïve.

The problem I am describing here is when there is a need to partition data across multiple geographical regions. Partitioning data essentially spreads data among several servers resulting in fast accesses. But when the data is spread across large geographical distances then this will result in significant network latencies. This is something that cannot be avoided.

Memcached is a common technique to store commonly read data into in-memory caches preventing frequent dips to the database. Memcached accesses data through “gets” and updates data through “sets”. Data is accessed based on a key which is hashed to one of several participating servers. Thus memcached distributes the data among several participating servers in a server list.  Reads and writes are of the order of O(1) and extremely fast. This works fine as long as servers belong to a single region or if the data center is in the same region. The network latencies will be low and the latency of the application will not be severely affected.

Now consider a situation where the memcached servers have to be distributed to multi-region data centers. While this is an excellent scheme for Disaster Recovery (DR) it introduces its own set of attendant problems.

Memcached will hash the entire data set and distribute it over the entire server list. Now “gets” of data from one geographical region to another will have significant latency. Since the laws of physics mandate that nothing can exceed the speed of light, we will be stuck with appreciable latencies for inter-region reads and writes.  So while a multi-region deployment provides for geographical resiliency it does introduce issues of latency and degraded throughput.

So what is the solution? One possible solution is to replicate the data across the regions. The solution to this problem is to replicate data in all the regions.  One technique that I can think of is to have the application to implement “local reads & global writes”.  This technique provides for the AP part of the CAP Theorem. The CAP theorem states that it is impossible to completely provide Consistency, Availability and Partition tolerance to distributed application. The “local reads & global writes” method will assure availability and partition tolerance while providing for eventual consistency.

In this technique, updates are done both on local servers along with asynchronous writes to all data centers. The writes are hence global in nature. The updates will not wait for all writes to complete before moving along. However reads will be local ensuring that the latency is low. Data reads based on data proximity will ensure that latency is really low.

Since writes are asynchronous the data will tend to be “eventually consistent” rather than being “strongly consistent” but this is a tradeoff that can be taken into account. Ideally it will be essential to implement the quorum protocol along with the “local reads & global writes” technique to ensure that you read your writes.

The application could have a modified quorum protocol such that R+ W > N where R is the number of data reads and W is the number of writes to servers and N is the total number of servers in the memcached server list.

Similar technique has been used in Cassandra & CouchDB etc.

With the “local reads & global writes” technique it is possible keep the latencies within reasonable limits since data reads will be based on proximity. Also replication the data to all regions will also ensure that eventually all regions will have a consistent view of the data.

Find me on Google+

Eliminating the Performance Drag

Nothing is more important to designers and architects of web applications than performance.   Everybody dreams of applications that can roar and spit fire! Attributes that are most sought after in large scale web applications are low latency and high throughput.  Performance is money. So it is really important to work the design and churn the best possible design.

Squeezing performance from your application is truly an art. The challenges and excitement are somewhat similar to what a race car designer or an aeronautical engineer would experience in reducing the drag on the machine while increasing the thrust of the engine. Understanding the physics of program execution is truly a rare art.

This post will attempt to touch upon some key aspects that have to be looked at a little more closely to wring the maximum performance from your application.

The Store Clerk Pattern: This is an oft quoted analogy to describe the relation between latency and throughput. In this example the application can be likened to retail store with store clerks checking out customers who queue with their purchases. Assume that there are 5 store clerks and each take 1sec to process a customer. If there 5 customers the response time for each customer will be 1 sec and a total throughput of 5 customers/sec can be achieved. However if a 6th customer enters then he/she will have to wait 1 sec in the queue while 5 customers are being handled by the store clerks. For this customer the response time will be 1 sec (waiting) + 1 sec (processing) or a total response time of 2 secs. It can be readily seen that as more customers queue up the wait times will increase and the latency will keep increasing. Also it has to be noted that the throughput will plateau at 5 customers/sec and cannot go above that.

The first point of attack in improving performance is to identify the store clerk pattern in your application. Identify where you application has a queue of incoming requests and a thread pool to address these requests as they get processed.  The latency and throughput are governed by the number of parallel thread (store clerks) who process and the wait times in the queue. One naïve technique is to increase the number of threads in the pool or increase the number of pools. However this may be limited by the CPU and system limitations. What is extremely important is to identify what factors contribute to the processing of each request. While processing, do threads need to access and retrieve data? Do they have to make API or SQL calls?  Identify what is the worst case performance of the thread and determine if this worst case can be improved by a different algorithm. So the key in the store clerk pattern is a) to optimize the threads in the pool and b) to improve the worst case performance of processing the request.

Resource Contention: This is another area of the application that needs to be looked at very closely. It is quite likely that data is being shared by many threads. Access to shared data is going to involve locks and waits. Identify and determine the worst case wait for threads. Is your application read-heavy and write-light or write-heavy and read-light? In the former situation it may be worthwhile to use a Reader-Writer locking algorithm in which many number of readers can simultaneously read data by updating a semaphore. However a write, which happens occasionally, will result in locking the resource and cause the  wait of all reader threads. However if the application is write-heavy then other alternatives like message based locking could be used. Clearly thread waits can be a drain on performance.

Algorithmic changes: If there are modules that perform enormous number of insertions, updates or deletions on data in memory then this has to be looked at closely. Determine the type of data structures or STLs being used.  The solution is to be able to re-organize data so that the operation happens much more efficiently ideally reaching towards   O (1). Maybe the data may need to be organized as hash map of lists or a hash map pointing to n-ary trees instead of a list of lists. This will really require deep thought and careful analysis to identify the best possible approach that provides the least possible times for the most common operation.

From Relational to NoSQL : Though the transition from a RDBMS to a NoSQL databases like Cassandra, CouchDB  etc would really be based on scalability, the ability to partition data horizontally and hash the key for accesses, updations and deletions will be really fast and is an avenue that is worth looking into.

Caching : This is a widely used technique to reduce frequent SQL queries to the database. Data that is commonly used can be cached in-memory. One such technique is to use memcached.  Memcached caches data across several servers. Access to data is through hashing and is of the order of O (1). If there is a miss of data in the memcached server’s then data is accessed through a SQL query. Access to data is through simple get, put methods in which the key is hashed to identify the server in which the data is stored.

Profiling : The judicious use of profiling tools  is extremely important in  optimizing performance. Tools like valgrind truly help in identifying bottlenecks. Other tools also help in monitoring thread pools and identifying where resource contention is taking place. It may also be worthwhile to timestamp different modules and collect data over several thousand runs, average them and pin-point trouble spots.

These are some technique that can be used for optimizing performance. However improving performance beyond a point will really depend on being able to visualize the application in execution and divining problem hot spots.

Find me on Google+