Going deeper into IBM’s Quantum Experience!

Introduction

In this post I delve deeper into IBM’s Quantum Experience. As mentioned in my earlier post “Venturing into IBM’s Quantum Experience”, IBM, has opened up its Quantum computing environment, to the general public, as the Quantum Experience. The access to Quantum Experience is through IBM’s Platform as a Service (PaaS) offering, Bluemix™. Clearly this is a great engineering feat, which integrates the highly precise environment of Quantum Computing, where the qubits are maintained at 5 milliKelvin, and the IBM Bluemix PaaS environment on Softlayer. The Quantum Experience, is in fact Quantum Computing as a Service (QCaaS).  In my opinion, the Quantum Experience, provides a glimpse of tomorrow, today,

Disclaimer: This article represents the author’s viewpoint only and doesn’t necessarily represent IBM’s positions, strategies or opinions

Note: Also by the way, feel free to holler if you find anything incorrect or off the mark in my post. I am just getting started on quantum computing so there may be slip ups.

A) Bloch sphere

6In my earlier post the operations of the X, Y, Z, H, S, and S1 were measured using the standard or diagonal basis and the results were in probabilities of the qubit(s). However, the probabilities alone, in the standard basis, are not enough to specify a quantum state because it does not capture the phase of the superposition. A convenient representation for a qubit is the Bloch sphere.

The general state of a quantum two-level system can be written in the form

|ψ⟩=α|0⟩+β|1⟩,

Where α and β are complex numbers with |α|2+|β|2=1. This leads to the “canonical” parameterized form

|ψ⟩= cos Θ/2 |0> + e sin Θ/2 |1>                        (A)

in terms of only two real numbers θ and φ, with natural ranges 0 ≤ θ ≤ π and 0 ≤ φ ≤ 2π. These are the same as the polar angles in 3-dimensional spherical coordinates, and this leads to the representation of the state (1) as a point on a unit sphere called the Bloch sphere.

In the notation of (A), the state |0> is represented by the North pole, and the state |1> by the South pole. Note:  The states |0> and |1> , n the Bloch sphere are not orthogonal to each other. The states on the equator of the Bloch sphere, correspond to superpositions of |0> and |1> with equal weights (θ = π∕2), and different phases, parameterized by the azimuthal angle φ (the “longitude”)

In the picture below  Bloch  measurements  are performed on the operations on the qubits

1

The results of the Bloch measurements for the combination of  quantum gates are shown below

i) Quantum gate operations and Bloch measurements

4

ii) Quantum gate operations as Superposition operations

5

B) Classical vs Quantum computing
A classical computer that has N-bits has 2^{N}possible configurations. However, at any
one point in time, it can be in one, and only one of  2N  configurations. Interestingly, the quantum computer also takes in a n -bit number and outputs a n -bit number; but because of the superposition principle and the possibility of entanglement, the intermediate state is very different.

A system which had N different mutually exclusive states can be represented as |1>, |2>. . . |N> using the Dirac’s bra-ket notation

A pure quantum state is a superposition of all these states
Φ = α1 1> + α2 2> + …. + αN N>
To describe it requires complex numbers, giving a lot more room for maneuvering.

C) The CNOT gate
The CNOT gate or the Controlled-Not gate is an example of a two-qubit quantum gate. The CNOT gate’s action is to flip (apply a NOT or X gate to) the target qubit if the control qubit is 1; otherwise it does nothing. The CNOT plays the role of the classical XOR gate, but unlike the XOR, The CNOT gate is a two-output gate and is reversible It is represented by the matrix by the following 4 x 4 matrix

\begin{pmatrix}1 & 0 & 0 &0 \\ 0 & 1 & 0 &0 \\  0& 0 &  0&1 \\ 0 & 0 & 1 & 0\end{pmatrix}

The CNOT gate flips the target bit if the control bit is 1, otherwise it does nothing if it’s 0:

More specifically
CNOT|0>|b> = |0>|b>
CNOT|1>|b>= |1>|1 – b>

The operation of the CNOT gate can be elaborated as below
The 2-qubit basis states can be represented as four-dimensional vectors
|00> = \begin{pmatrix} 1& 0 & 0 & 0 \end{pmatrix}^{T}
|01> = \begin{pmatrix} 0& 1 & 0 & 0 \end{pmatrix}^{T}
|10> = \begin{pmatrix} 0& 0 & 1 & 0 \end{pmatrix}^{T}
|11> = \begin{pmatrix} 0& 0 & 0 & 1 \end{pmatrix}^{T}

For example, a quantum state may be expanded as a linear combination of this basis:
|ψ⟩=a|00⟩+b|01⟩+c|10⟩+d|11⟩

The CNOT matrix can  be applied as below
CNOT*|ψ⟩=CNOT*(a|00⟩+b|01⟩+c|10⟩+d|11⟩)
= a*CNOT*|00⟩+…+d*CNOT*|11⟩

where you perform standard matrix multiplication on the basis vectors to get:
CNOT*|ψ⟩=a|00⟩+b|01⟩+c|11⟩+d|10⟩

In other words, the CNOT gate has transformed
|10⟩↦|11⟩ and |11⟩↦|10⟩

i) CNOT operations in R code

# CNOT gate
cnot= matrix(c(1,0,0,0,0,1,0,0,0,0,0,1,0,0,1,0),nrow=4,ncol=4)
cnot
##      [,1] [,2] [,3] [,4]
## [1,]    1    0    0    0
## [2,]    0    1    0    0
## [3,]    0    0    0    1
## [4,]    0    0    1    0
#a. Qubit |00> 
q00=matrix(c(1,0,0,0),nrow=4,ncol=1)
q00
##      [,1]
## [1,]    1
## [2,]    0
## [3,]    0
## [4,]    0
# CNOT *q00 ==> q00
a <- cnot %*% q00
a
##      [,1]
## [1,]    1
## [2,]    0
## [3,]    0
## [4,]    0
#b.Qubit |01>
q01=matrix(c(0,1,0,0),nrow=4,ncol=1)
q01
##      [,1]
## [1,]    0
## [2,]    1
## [3,]    0
## [4,]    0
# CNOT *q01 ==> q01
a <- cnot %*% q01
a
##      [,1]
## [1,]    0
## [2,]    1
## [3,]    0
## [4,]    0
#c. Qubit |10>
q10=matrix(c(0,0,1,0),nrow=4,ncol=1)
q10
##      [,1]
## [1,]    0
## [2,]    0
## [3,]    1
## [4,]    0
# CNOT *q10 ==> q11
a <- cnot %*% q10
a
##      [,1]
## [1,]    0
## [2,]    0
## [3,]    0
## [4,]    1
#d. Qubit |11>
q11=matrix(c(0,0,0,1),nrow=4,ncol=1)
q11
##      [,1]
## [1,]    0
## [2,]    0
## [3,]    0
## [4,]    1
# CNOT *q11 ==> q10
a <- cnot %*% q11
a
##      [,1]
## [1,]    0
## [2,]    0
## [3,]    1
## [4,]    0

D) Non Clifford gates
The quantum gates discussed in my earlier post (Pauli X, Y, Z, H, S and S1) and the CNOT are members of a special group of gates known as the ‘Clifford group’. These gates can be simulated efficiently on a classical computer. Therefore, the Clifford group is not universal.  A finite set of gates that can approximate any arbitrary unitary matrix is known as a universal gate set. This is similar,  to how certain sets of classical logic gates, such as {AND, NOT}, are functionally complete and can be used to build any Boolean function ( I remember this axiom/fact from my Digital Electronics -101 class about 3  decades back!).

Adding almost any non-Clifford gate to single-qubit Clifford gates and CNOT gates makes the group universal which I presume can simulate any arbitrary unitary matrix.  The non-Clifford gates, discussed are the T and  Tǂ gates

These are given by

T = \begin{pmatrix}1 & 0\\ 0 & e^{^{i\prod /4}}\end{pmatrix}

Tǂ =\begin{pmatrix}1 & 0\\ 0 & e^{^{-i\prod /4}}\end{pmatrix}

i) T gate operations
The T gate makes it possible to reach  different points of the Bloch sphere.  By increasing the number of T-gates in the quantum circuit ( we start to cover the Bloch sphere more densely with states that can be reached

ii)  T Gates of depth 2 – Computational Measurement
9

Simulating in Composer
10

iii) Simulating in R Code
Measurement only gives the real part and does not provide info on phase

# T Gate 
T=matrix(c(1,0,0,exp(1i*pi/4)),nrow=2,ncol=2)
# Simulating T Gate depth-2 - Computational  measurement
a=S%*%T%*%H%*%T%*%H%*%q0
a
##                      [,1]
## [1,] 0.8535534+0.3535534i
## [2,] 0.1464466+0.3535534i

iv) 2 T Gates – Bloch  Measurement
7

Bloch measurement

8

v) Simulating T gate in R code
This gives the phase values as shown in the Bloch sphere

# Simulating T Gate depth-2 - Bloch measurement (use a diagonal basis H gate in front)
a=H%*%S%*%T%*%H%*%T%*%H%*%q0
a
##                [,1]
## [1,] 0.7071068+0.5i
## [2,] 0.5000000+0.0i


E) Quantum Entanglement – The case of ‘The Spooky action at a distance’
One of the infamous counter-intuitive ideas of quantum mechanics is that two systems that appear too far apart to influence each other can nevertheless behave in ways that, though individually random, are too strongly correlated to be described by any classical local theory.  For e.g. when the 1st qubit of a pair of “quantum  entangled” qubits are measured, this automatically determines the 2nd qubit, though the individual qubits may be separated by extremely large distances. It appears that the measurement of the first qubit cannot affect the 2nd qubit which is too far apart to be be influenced and also given the fact  that nothing can travel faster than the speed of light.  More specifically

“Suppose Alice has the first qubit of the pair, and Bob has the second. If Alice measures her qubit in the computational basis and gets outcome b ∈ {0, 1},  then the state collapses to |bb> . In other words the measurements and outcome of the 1st qubit determines the outcome of the  2nd qubit . How weird is that?

Similarly, if Alice measures her qubit in some other basis, this will collapse the joint state (including Bob’s qubit) to some state that depends on her measurement basis as well as its outcome. Somehow Alice’s action seems to have an instantaneous effect on Bob’s side—even if the two qubits are light-years apart!”

How weird is that!

Einstein, whose theory of relativity posits that information and causation cannot travel faster than the speed of light, was greatly troubled by this, . Einstein called such effects of entanglement “spooky action at a distance”.

In the 1960s, John Bell devised entanglement-based experiments whose behavior cannot be reproduced by any “local realist” theory where the implication of local and realist is given below

Locality: No information can travel faster than the speed of light. There is a hidden variable that defines all the correlations.

Realism:  All observables have a definite value independent of the measurement

i) Bell state measurements
The mathematical proof for the Bell tests  are quite abstract  and mostly escaped my grasp. I  hope to get my arms around this beast, in the weeks and months to come. However, I understood how to run the tests and perform the calculations which are included below.  I have executed the Bell Tests on

a) Ideal Quantum Processor (Simulator with ideal conditions)
b) Realistic Quantum Processor (Simulator with realistic conditions)
c) Real Quantum Processor. For this I used 8192 ‘shots’ repeats of the experiment

I finally calculate |C| for all 3 tests

The steps involved in calculating |C|
1.  Execute ZW, ZV, XW, XV
2. Calculate = P(00) + P(11) – P(01) – P(10)
3.  Finally |C| = ZW + ZV + XW – XV

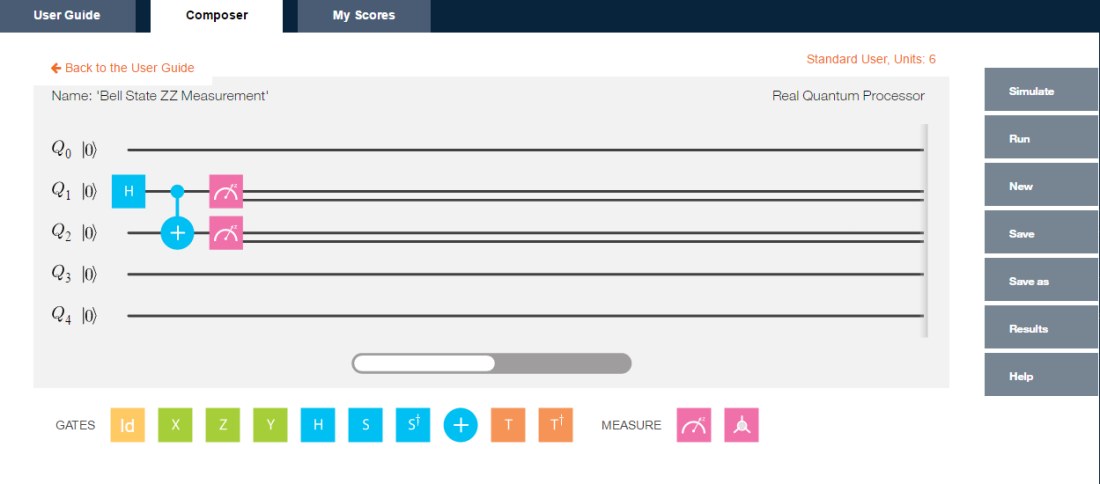
Preparation of Qubit |00>
The qubits are in state |00> The H gate  takes the first qubit to the equal superposition

1/√2(|00> + |10>)  and the CNOT gate flips the second qubit if the first is excited, making the state  1/√2(|00> + |11>). This is the entangled state (commonly called a Bell state)

11

Simulating in Composer
This prepares the entangled state 1/√2(|00> + |11>)

12

It can be seen that the the qubits |00> and  |11> are created

1) Simulations on Ideal Quantum processor

a) Bell state ZW (Ideal) 
13
Simulation
24
P(00) = 0.427
P(01) = 0.073
P(10) =0.073
P(11) = 0.427

b) Bell state ZV (Ideal) 
14

Simulation

25
P(00) = 0.427
P(01) = 0.073
P(10) =0.073
P(11) = 0.427

c) Bell state XW (Ideal)
26

Measurement
27
P(00) = 0.427
P(01) = 0.073
P(10) =0.073
P(11) = 0.427

d) Bell state XV (Ideal)
28

Simulating Bell State XV in Composer
16
P(00) = 0.073
P(01) = 0.473
P(10) = 0.473
P(11) =0.73

Bell test measurement in Ideal Quantum Processor are given below
Untitled

For the Ideal Quantum Processor
|C) = 2.832

2) Simulations on the Realistic  Quantum Processor
The Bell tests above were simulated on Realistic Quantum Processor. The results are included below

Untitled

For the Realistic Quantum Processor
|C) = 2.523

3) Real IBM Quantum  Processor (8192 shots)
Finally the Bell Tests were executed in IBM’s Real Quantum Processor for 8192 shots, each requiring 5 standard units. The tests were queued, executed and the results sent by mail. The results are included below
a) Bell State ZW measurement (Real)
29

b) Bell state ZV measurement  (Real)
30
c) Bell State XW measurement (Real)
31
d) Bell state XV measurement (Real)

32

;

The results were tabulated and |C| computed. Bell test measurement in Real Quantum Processor are given below

Untitled

The Bell measurements on the Reak Quantum Processor is
|C) = 2.509

Conclusion
This post included details on the CNOT and the non-Clifford gates. The Bell tests were performed on all 3 processors Ideal, Realistic and Real Quantum Processors and in each case the |C| > 2. While I have been to execute the tests I will definitely have to spend more time understanding the nuances.

I hope to continue this journey into quantum computing the months to come. Watch this space!

Disclaimer: This article represents the author’s viewpoint only and doesn’t necessarily represent IBM’s positions, strategies or opinions

References
1.IBM Quantum Experience – User Guide
2.Quantum Computing lecture notes – Ronald De Wolf
3.Bloch sphere
4.Basic concepts in quantum computation
5.Physics Stack Exchange

You may also like
1.Revisiting crimes against women in India
2.Natural language processing: What would Shakespeare say?
3. My book ‘Practical Machine Learning with R and Python’ on Amazon
4. Introducing QCSimulator: A 5-qubit quantum computing simulator in R
5.Beaten by sheer pace – Cricket analytics with yorkr
6.A method for optimal bandwidth usage by auctioning available bandwidth using the OpenFlow protocol
7.TWS-4: Gossip protocol: Epidemics and rumors to the rescue
8.Bend it like Bluemix, MongoDB using Auto-scale – Part 1!
9.Fun simulation of a Chain in Android
10.Cricket analytics with cricketr in paperback and Kindle versions

From developerWorks – What’s up, Watson? Using Watson QAAPI with Bluemix and NodeExpress

2

My post in IBM developer Works – What’s up, Watson? Using Watson QAAPI with Bluemix and NodeExpress

Create a Bluemix™ application that uses Watson’s Question and Answer API (QAAPI). IBM’s Watson is capable of understanding the nuances of the English language. Bluemix now includes eight services from Watson, including Concept Expansion, Language Identification, Machine Translation, and Question and Answer. For more information on Watson’s QAAPI and the many services that have been included in Bluemix, see Watson Services.

The current release of Bluemix Watson is a corpus of medical facts. Watson has been made to ingest medical documents in multiple formats (doc, pdf, html, text, and so on), and the user can pose medical questions to the Watson QAAPI.

This tutorial shows how to use the Watson Question and Answer API to make queries and get results of various types

n the application described in this tutorial, NodeExpress is used to create a web server and to post questions to Watson using REST APIs. Jade is used to format the results of Watson’s response.

For more details and the latest code please see my full article in IBM developerWorks What’s up, Watson? Using Watson QAAPI with Bluemix and NodeExpress

Bend it like Bluemix, MongoDB with auto-scaling – Part 3

In this last post of this series, I test the performance of Bluemix & MongoDB against  concurrent queries and deletes to the cloud based app with Mongo DB, with auto-scaling on. Before I started these series of tests I moved the Overload policy a couple of notches higher and made it scale out if  memory utilization > 75% for 120 secs and < 30% for 120 secs (from the earlier 55% memory utilization) as shown below.

27

The code for bluemixMongo app can be forked from Devops at bluemixMongo or can be cloned from GitHub at  bluemix-mongo-autoscale. The multi-mechanize scripts can be downloaded from GitHub at multi-mechanize     Before starting the testing I checked the current number of documents inserted by the concurrent inserts (see Bend it like Bluemix., MongoDB using Auto-scaling – Part 2). The total number as determined by checking the logs was 1380 17   Sure enough with the scaling policy change after 2 minutes the number of instanced dropped from 3 to 2

18

1. Querying the bluemixMongo app with Multi-mechanize

The Multi-mechanize Python script used for querying the bluemixMongo app simply invokes the app’s userlist URL (resp=br.open(“http://bluemixmongo.mybluemix.net/userlist/&#8221;)

v_user.py

def run(self):
# create a Browser instance
br = mechanize.Browser()
# don"t bother with robots.txt
br.set_handle_robots(False)
# start the timer
start_timer = time.time()
#print("Display userlist")
# Display 5 random documents
resp=br.open("http://bluemixmongo.mybluemix.net/userlist/")
assert("Example Mongo Page" in resp.get_data())
# stop the timer
latency = time.time() - start_timer
self.custom_timers["Userlist"] = latency
r = random.uniform(1, 2)
time.sleep(r)
self.custom_timers['Example_Timer'] = r

The configuration setup for this script creates 2 sets of 10 concurrent threads

config.cfg
run_time = 300
rampup = 0
results_ts_interval = 10
progress_bar = on
console_logging = off
xml_report = off
[user_group-1]
threads = 10
script = v_user.py
[user_group-2]
threads = 10
script = v_user.py

The corresponding userlist.js for querying the app is shown below. Here the query is constructed by creating a ‘RegularExpression’ with  a random Firstname, consisting of a random letter and a random number. Also the query is also limited to 5 documents.

function(callback)
{
// Display a random set of 5 records based on a regular expression made with random letter, number
var randnum = Math.floor((Math.random() * 10) + 1);
var alpha = ['A','B','C','D','E','F','G','H','I','J','K','L','M','N','O','P','Q','R','S','T','U','V','X','Y','Z'];
var randletter = alpha[Math.floor(Math.random() * alpha.length)];
var val =  randletter + ".*" + randnum + ".*";
// Limit the display to 5 documents
var results = collection.find({"FirstName": new RegExp(val)}).limit(5).toArray(function(err, items){
if(err) {
console.log(err + " Error getting items for display");
}
else {
res.render('userlist',
{ "userlist" : items
}); // end res.render
} //end else
db.close(); // Ensure that the open connection is closed
}); // end toArray function
callback(null, 'two');
}

2. Running the userlist query

The following screenshot shows the userlist query being executed concurrently with Multi-mechanize. Note that the number of  instances also drops down to 1

18

3. Deleting documents with Multi-mechanize

The multi-mechanize script for deleting a document is shown below. This script calls the URL with resp = br.open(“http://bluemixmongo.mybluemix.net/remuser&#8221;). No values are required to be entered into the form and the ‘submit’ is simulated.

v_user.py
def run(self):
# create a Browser instance
br = mechanize.Browser()
# don"t bother with robots.txt
br.set_handle_robots(False)
br.addheaders = [("User-agent", "Mozilla/5.0Compatible")]
# start the timer
start_timer = time.time()
# submit the request
resp = br.open("http://bluemixmongo.mybluemix.net/remuser")
#resp = br.open("http://localhost:3000/remuser")
resp.read()
# stop the timer
latency = time.time() - start_timer
# store the custom timer
self.custom_timers["Load_Front_Page"] = latency
# think-time
time.sleep(2)
# select first (zero-based) form on page
br.select_form(nr=0)
# set form field
br.form["firstname"] = ""
br.form["lastname"] = ""
br.form["mobile"] = ""
# start the timer
start_timer = time.time()
# submit the form
resp = br.submit()
resp.read()
print("Removed")
# stop the timer
latency = time.time() - start_timer
# store the custom timer
self.custom_timers["Delete"] = latency
# think-time
time.sleep(2)

config.cfg

The config file is set to start 2 sets of 10 concurrent threads and execute for 300 secs

[global]
run_time = 300
rampup = 0
results_ts_interval = 10
progress_bar = on
console_logging = off
xml_report = off
[user_group-1]
threads = 10
script = v_user.py
[user_group-2]
threads = 10
script = v_user.py
;

deleteuser.js

This Node.js script does a findOne() document and does a remove with the ‘justOne’ set to true

collection.findOne(function(err, item) {
// Delete just a single record
collection.remove(item, {justOne:true},(function (err, doc) {
if (err) {
// If it failed, return error
res.send("There was a problem removing the information to the database.");
}
else {
// If it worked redirect to userlist
res.location("userlist");
// And forward to success page
res.redirect("userlist");
}
}));
});
collection.find().toArray(function(err, items) {
console.log("Length =----------------" + items.length);
db.close();
});
callback(null, 'two');

4. Running the deleteuser multimechanize script

The output of the script executing and the reduction of the number of instances because of the change in the memory utilization policy is shown

21

5. Multi-mechanize

As mentioned in the previous posts

The multi-mechanize commands are executed as follows
To create a new project
multimech-newproject.exe userlist
This will create 2 folders a) results b) test_scripts and the file c) config.cfg. The v_user.py needs to be updated as required

To run the script
multimech-run.exe userlist

The details of the response times for the query is shown below .

All_Transactions_response_times_intervals


More details on latency and throughput for the queries and the deletes are included in the results folder of multi-mechanize    

6. Autoscaling The details of the auto-scaling service is shown below

a. Scaling Metric Statistics

22

b. Scaling history 23

7. Monitoring and Analytics (M & A) The output from M & A is shown  below


a. Performance Monitoring 24  

b. Log Analysis output The log analysis give a detailed report on the calls made to the app, the console log output and other useful information

25

The series of the 3 posts Bend it like Bluemix, MongoDB with auto-scaling demonstrated the ability of the cloud to expand and shrink based on the load on the cloud.An important requirement for Cloud Architects is design applications that can  scale horizontally without impacting the performance while keeping the costs optimum. The real challenge to auto-scaling is the need to make the application really distributed as opposed to the monolithic architectures we are generally used to.   I hope to write another post on creating simple distributed application later.

Hasta la Vista!

Also see
1.  Bend it like Bluemix, MongoDB with autoscaling – Part 1
2. Bend it like Bluemix, MongoDB with autoscaling – Part 2

You may like :
a) Latency, throughput implications for the cloud
b) The many faces of latency
c) Brewing a potion with Bluemix, PostgreSQL & Node.js in the cloud
d)  A Bluemix recipe with MongoDB and Node.js
e)Spicing up IBM Bluemix with MongoDB and NodeExpress
f) Rock N’ Roll with Bluemix, Cloudant & NodeExpress

Disclaimer: This article represents the author’s viewpoint only and doesn’t necessarily represent IBM’s positions, strategies or opinions

Bend it like Bluemix, MongoDB using Auto-scaling – Part 2!

This post takes off from my previous post Bend it like Bluemix, MongoDB using Auto-scale –  Part 1! In this post I generate traffic using Multi-Mechanize a performance test framework and check out the auto-scaling on Bluemix, besides also doing some rudimentary check on the latency and throughput for this test application. In this particular post I generate concurrent threads which insert documents into MongoDB.

Note: As mentioned in my earlier post this is more of a prototype and the typical situation when architecting cloud applications. Clearly I have not optimized my cloud app (bluemixMongo) for maximum efficiency. Also this a simple 2 tier application with a rudimentary Web interface and a NoSQL DB at This is more of a Proof of Concept (PoC) for the auto-scaling service on Bluemix.

As earlier mentioned the bluemixMongo app is a modification of my earlier post Spicing up a IBM Bluemix cloud app with MongoDB and NodeExpress. The bluemixMongo cloud app that was used for this auto-scaling test can be forked from Devops at bluemixMongo or from GitHib at bluemix-mongo-autoscale. The Multi-mechanize config file, scripts and results can be found at GitHub in multi-mechanize

The document to be inserted into MongoDB consists of 3 fields – Firstname, Lastname and Mobile. To simulate the insertion of records into MongoDB I created a Multi-Mechanize script that will generate random combination of letters and numbers for the First and Last names and a random 9 digit number for the mobile. The code for this script is shown below

1. The snippet below measure the latency for loading the ‘New User’ page

v_user.py
def run(self):
# create a Browser instance
br = mechanize.Browser()
# don"t bother with robots.txt
br.set_handle_robots(False)
print("Rendering new user")
br.addheaders = [("User-agent", "Mozilla/5.0Compatible")]
# start the timer
start_timer = time.time()
# submit the request
resp = br.open("http://bluemixmongo.mybluemix.net/newuser")
#resp = br.open("http://localhost:3000/newuser")
resp.read()
# stop the timer
latency = time.time() - start_timer
# store the custom timer
self.custom_timers["Load Add User Page"] = latency
# think-time
time.sleep(2)

The script also measures the time taken to submit the form containing the Firstname, Lastname and Mobile

# select first (zero-based) form on page
br.select_form(nr=0)
# Create random Firstname
a = (''.join(random.choice(string.ascii_uppercase) for i in range(5)))
b = (''.join(random.choice(string.digits) for i in range(5)))
firstname = a + b
# Create random Lastname
a = (''.join(random.choice(string.ascii_uppercase) for i in range(5)))
b = (''.join(random.choice(string.digits) for i in range(5)))
lastname = a + b
# Create a random mobile number
mobile = (''.join(random.choice(string.digits) for i in range(9)))
# set form field
br.form["firstname"] = firstname
br.form["lastname"] = lastname
br.form["mobile"] = mobile
# start the timer
start_timer = time.time()
# submit the form
resp = br.submit()
print("Submitted.")
resp.read()
# stop the timer
latency = time.time() - start_timer
# store the custom timer
self.custom_timers["Add User"] = latency

2. The config.cfg file is setup to generate 2 asynchronous thread pools of 10 threads for about 400 seconds

config.cfg
run_time = 400
rampup = 0
results_ts_interval = 10
progress_bar = on
console_logging = off
xml_report = off
[user_group-1]
threads = 10
script = v_user.py
[user_group-2]
threads = 10
script = v_user.py

3. The code to add a new user in the app (adduser.js) uses the ‘async’ Node module to enforce sequential processing.

adduser.js
async.series([
function(callback)
{
collection = db.collection('phonebook', function(error, response) {
if( error ) {
return; // Return immediately
}
else {
console.log("Connected to phonebook");
}
});
callback(null, 'one');
},
function(callback)
// Insert the record into the DB
collection.insert({
"FirstName" : FirstName,
"LastName" : LastName,
"Mobile" : Mobile
}, function (err, doc) {
if (err) {
// If it failed, return error
res.send("There was a problem adding the information to the database.");
}
else {
// If it worked, redirect to userlist - Display users
res.location("userlist");
// And forward to success page
res.redirect("userlist")
}
});
collection.find().toArray(function(err, items) {
console.log("**************************>>>>>>>Length =" + items.length);
db.close(); // Make sure that the open DB connection is close
});
callback(null, 'two');
}
]);

4. To checkout auto-scaling the instance memory was kept at 128 MB. Also the scale-up policy was memory based and based on the memory of the instance exceeding 55% of 128 MB for 120 secs. The scale up based on CPU utilization was to happen when the utilization exceed 80% for 300 secs.

6

5. Check the auto-scaling policy

7

6. Initially as seen there is just a single instance

9

7. At around 48% of the script with around 623 transactions the instance is increased by 1. Note that the available memory is decreased by 640 MB – 128 MB = 512 MB.

10

8. At around 1324 transactions another instance is added

Note: Bear in mind

a) The memory threshold was artificially brought down to 55% of 128 MB.b) The app itself is not optimized for maximum efficiency

12

9. The Metric Statistics tab for the Autoscaling service shows this memory breach and the trigger for autoscaling

13

10. The Scaling history Tab for the Auto-scaling service displays the scale-up and scale-down and the policy rules based on which the scaling happened

14

11. If you go to the results folder for the Multi-mechanize tool the response and throughput are captured.

The multi-mechanize commands are executed as follows
To create a new project
multimech-newproject.exe adduser
This will create 2 folders a) results b) test_scripts and the file c) config.cfg. The v_user.py needs to be updated as required

To run the script
multimech-run.exe adduser

12.The results are shown below

a) Load Add User page (Latency)

Load Add User Page_response_times_intervals

b) Load Add User (Throughput)

Load Add User Page_throughput

c)Load Add User (Latency)

Add User_response_times_intervals

d) Load Add User (Throughput)

Add User_throughput

The detailed results can be seen at GitHub at multi-mechanize

13. Check the Monitoring and Analytics Page

a) Availability

16

b) Performance monitoring

15

So once the auto-scaling happens the application can be fine-tuned and for performance. Obviously one could do it the other way around too.

As can be seen adding NoSQL Databases like MongoDB, Redis, Cloudant DB etc. Setting up the auto-scaling policy is also painless as seen above.

Of course the real challenge in cloud applications is to make them distributed and scalable while keeping the applications themselves lean and mean!

See also

Also see
1.  Bend it like Bluemix, MongoDB with autoscaling – Part 1
3. Bend it like Bluemix, MongoDB with autoscaling – Part 3

You may like :
a) Latency, throughput implications for the cloud
b) The many faces of latency
c) Brewing a potion with Bluemix, PostgreSQL & Node.js in the cloud
d)  A Bluemix recipe with MongoDB and Node.js
e)Spicing up IBM Bluemix with MongoDB and NodeExpress
f) Rock N’ Roll with Bluemix, Cloudant & NodeExpress

a) Latency, throughput implications for the cloud

b) The many faces of latency

c) Design principles of scalable, distributed systems

Disclaimer: This article represents the author’s viewpoint only and doesn’t necessarily represent IBM’s positions, strategies or opinions

Bend it like Bluemix, MongoDB using Auto-scale – Part 1!

In the next series of posts I turn on the heat on my cloud deployment in IBM Bluemix and check out the elastic nature of this PaaS offering. Handling traffic load and elastically expanding and contracting is what the cloud does best. This is  where the ‘rubber really meets the road”. In this series of posts I generate the traffic load using Multi –Mechanize a performance test framework created by Corey Goldberg.

This post is based on an earlier cloud app that I created on Bluemix namely Spicing up a IBM Bluemix Cloud app with MongoDB and NodeExpress. I had to make changes to this code to iron out issues while handling concurrent  inserts, displays and deletes issued from the multi-mechanize tool and also to manage the asynchronous nightmare of Nodejs.

The code for this Bluemix, MongoDB with Auto-scaling can be forked  from Devops at bluemixMongo. The code can also be cloned from GitHub at bluemix-mongo-autoscale

1.  To get started, fork the code from Devops at bluemixMongo. Then change the host name in manifest.yml to something unique and click the Build and Deploy button on the top right in the page.

26

1a.  Alternatively the code can be cloned from GitHub at bluemix-mongo-autoscale. From the directory where the code is cloned push the code using Cloud Foundry’s cf command as follows

cf login -a https://api.ng.bluemix.net

cf push bluemixMongo –p . –m 128M

2. Now add the MongoDB service and click ‘OK’ to restage the server.

3

3. Add the Monitoring and Analytics (M & A) and also the Auto-scaling service. The M& A gives a good report on the Availability, Performance logging, and also provides Logging Analysis. The Auto-scaling service is the service that allows the app to expand elastically to changing traffic loads.

4

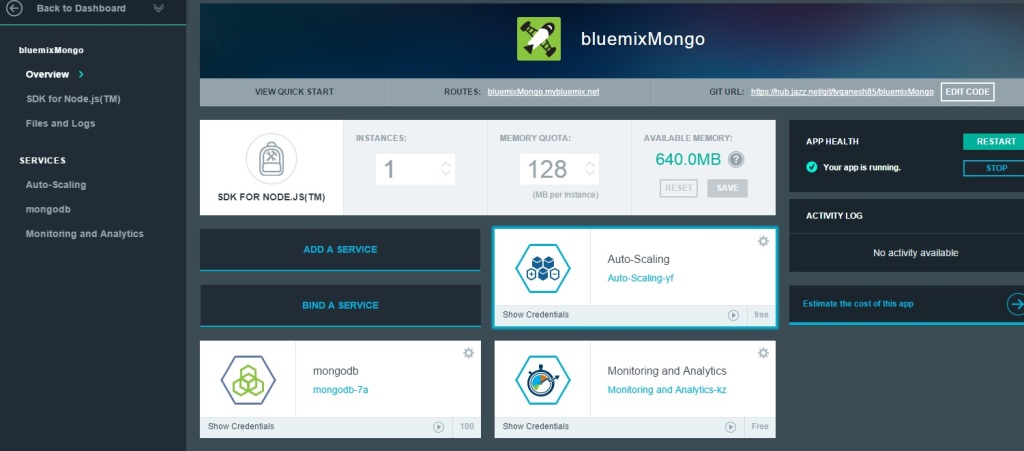
4. You should see the bluemixMongo app running with 3 services MongoDB, Autoscaling and M&A

5

5. You should now be able click the bluemixMongo.mybluemix.net and check the application out.

6.Now you configure the Overload Policy (auto scaling) policy. This is a slightly contrived example and the scaling policy is set to scale up if the Memory exceeds 55%. (Typically the scale up would be configured for > 80% memory usage)

6

7. Now check the configured Auto-scaling policy

7

8. Change the Memory Quota as appropriate. In my case I have kept the memory quota as 128 MB. Note the available memory is 640 MB and hence allows up to 5 instances. (By the way it is also possible to set any other value like 100 MB).

5

9. Click the Monitoring and Analytics service and take a look at the output in the different tabs

8

10. Next you need to set up the Performance test tool – Multi mechanize. Multi-mechanize creates concurrent threads to generate the load on a Web site or service. It is based on Python which  makes it easy to modify the scripts for hitting a website, making a REST call or submitting a form.

To setup Multi-mechanize you also need additional packages like numpy  matplotlib etc as the tool generates traffic based on a user provided script, measures latency and throughput besides also generating graphs for these.

For a detailed steps for setup of Multi mechanize please follow the steps in Trying out multi-mechanize web performance and load testing framework. Note: I would suggest that you install Python 2.7.2 and not the later 3.x version as some of the packages are based on the 2.7 version which has a slightly different syntax for certain Python statements

In the next post I will run a traffic test on the bluemixMongo application using Multi-mechanize and observe how the cloud app responds to the load.

Watch this space!
Also see
Bend it like Bluemix, MongoDB with autoscaling – Part 2!
Bend it like Bluemix, MongoDB with autoscaling – Part 3

You may like :
a) Latency, throughput implications for the cloud
b) The many faces of latency
c) Brewing a potion with Bluemix, PostgreSQL & Node.js in the cloud
d)  A Bluemix recipe with MongoDB and Node.js
e)Spicing up IBM Bluemix with MongoDB and NodeExpress
f) Rock N’ Roll with Bluemix, Cloudant & NodeExpress

Disclaimer: This article represents the author’s viewpoint only and doesn’t necessarily represent IBM’s positions, strategies or opinions

Revisiting Whats up, Watson – Using Watson’s Question and Answer with Bluemix – Part 2

In this I revisit the Bluemix app based on Watson’s Question and Answer service which I had posted in my earlier article “Whats up Watson? Using IBM Watson with Bluemix, NodeExpress – Part 1“. In this post I removed some redundant code and also added some additional checks to the Jade templates to handle responses to “focusless”  questions viz. Am I…? or “Is X contagious?”

You can run the app at Whatsup Watson?

The code can be forked and cloned from Devops at Whatsup

The code is also available at GitHub at Whatsup

The section below briefly describes the details of the implementation of the WhatsupWatson app

A) app.js

In the app.js module the VCAP environment is parsed to get the credentials to use the Watson Question and Answer service as shown below

if (process.env.VCAP_SERVICES) {
  var VCAP_SERVICES = JSON.parse(process.env.VCAP_SERVICES);
  // retrieve the credential information from VCAP_SERVICES for Watson QAAPI
  hostname   = VCAP_SERVICES["question_and_answer"][0].name;               
  passwd = VCAP_SERVICES["question_and_answer"][0].credentials.password; 
  username = VCAP_SERVICES["question_and_answer"][0].credentials.username; 
  watson_url = VCAP_SERVICES["question_and_answer"][0].credentials.url;
}

There different ways of asking Watson questions. Watson’s response will vary depending on the options and parameters that are used to POST the question to Watson. This app uses a route for each ‘question type’ and option. These are

a. Simple Synchronous Query: Post a simple synchronous query to Watson

This is the simplest query that we can pose to Watson. Here we need to just include the text of the question and the also a Sync Timeout. The Sync Timeout denotes the time client will wait for responses from the Watson service

// Ask Watson a simple synchronous query
app.get('/question',question.list);
app.post('/simplesync',simplesync.list);

b. Evidence based question: Ask Watson to respond to evidence given to it

Ask Watson for responses based on evidence given like medical conditions etc.

// Ask Watson for responses based on evidence provided
app.get('/evidence',evidence.list);
app.post('/evidencereq',evidencereq.list);

c. Request for a specified set of answers to a question: Ask Watson to give a specified number of responses to a question

// Ask Watson to provide specified number of responses to a query
app.get('/items',items.list);
app.post('/itemsreq',itemsreq.list);

d. Get a formatted response to a question: Ask Watson to format the response to the question

// Get a formatted response from Watson for a query
app.get('/format',format.list);
app.post('/formatreq',formatreq.list);

To get started with Watson we would need to connect the Bluemix app to the Watson’s QAAPI as a service by parsing the environment variable. This is shown below

B) simplesync.js


The code in simplesync.js, evidencereq.js, itemsreq.js,formatreq.js are similar. The modules construct the question in the format required. The details of the implementation of simplesync.js is included below a. The Watson’s corpus will be set to ‘healthcare’

parts = url.parse(watson_url +'/v1/question/healthcare');

b. The POST headers are set

// Set the required headers for posting the REST query to Watson
headers = {'Content-Type'  :'application/json',
                  'X-synctimeout' : syncTimeout,
                  'Authorization' : "Basic " + new Buffer(username+":"+passwd).toString("base64")};

c. The POST request options are set

// Create the request options to POST our question to Watson
var options = {host: parts.hostname,
port: 443,
path: parts.pathname,
method: 'POST',
headers: headers,
rejectUnauthorized: false, // ignore certificates
requestCert: true,
agent: false};

The question that is to be asked of Watson needs to be formatted appropriately based on the input received in the appropriate form (for e.g. simplesync.jade)

// Get the values from the form
var syncTimeout = req.body.timeout;
var query = req.body.query;
// create the Question text to ask Watson
var question = {question : {questionText :query }};
var evidence = {"evidenceRequest":{"items":1,"profile":"yes"}};
// Set the POST body and send to Watson
req.write(JSON.stringify(question));
req.write("\n\n");
req.end();

Now you POST the Question to Watson and receive the stream of response using Node.js’ .on(‘data’,) & .on(‘end’) shown below

var req = https.request(options, function(result) {
result.setEncoding('utf-8');
// Retrieve and return the result back to the client
result.on(“data”, function(chunk) {
output += chunk;
});

result.on('end', function(chunk) {		  
           var answers = JSON.parse(output);
			      results = answers[0];
			      res.render(
					 'answer', {
                      "results":results
                                        
			   });
			
});

The results are parsed and formatted displayed using Jade. For the Jade templates I have used a combination of Jade and in-line HTML tags.

Included below is the part of the jade template with in-line HTML tagging

c) answer.jade

mplementation details of WhatsupWatsonapp

The section below briefly describes the details of the implementation of the WhatsupWatson app

A) app.js

In the app.js module the VCAP environment is parsed to get the credentials to use the Watson Question and Answer service as shown below

if (process.env.VCAP_SERVICES) {
  var VCAP_SERVICES = JSON.parse(process.env.VCAP_SERVICES);
  // retrieve the credential information from VCAP_SERVICES for Watson QAAPI
  hostname   = VCAP_SERVICES["question_and_answer"][0].name;               
  passwd = VCAP_SERVICES["question_and_answer"][0].credentials.password; 
  username = VCAP_SERVICES["question_and_answer"][0].credentials.username; 
  watson_url = VCAP_SERVICES["question_and_answer"][0].credentials.url;
}

There different ways of asking Watson questions. Watson’s response will vary depending on the options and parameters that are used to POST the question to Watson. This app uses a route for each ‘question type’ and option. These are

a. Simple Synchronous Query: Post a simple synchronous query to Watson

This is the simplest query that we can pose to Watson. Here we need to just include the text of the question and the also a Sync Timeout. The Sync Timeout denotes the time client will wait for responses from the Watson service

// Ask Watson a simple synchronous query
app.get('/question',question.list);
app.post('/simplesync',simplesync.list);

b. Evidence based question: Ask Watson to respond to evidence given to it

Ask Watson for responses based on evidence given like medical conditions etc.

// Ask Watson for responses based on evidence provided
app.get('/evidence',evidence.list);
app.post('/evidencereq',evidencereq.list);

c. Request for a specified set of answers to a question: Ask Watson to give a specified number of responses to a question

// Ask Watson to provide specified number of responses to a query
app.get('/items',items.list);
app.post('/itemsreq',itemsreq.list);

d. Get a formatted response to a question: Ask Watson to format the response to the question

// Get a formatted response from Watson for a query
app.get('/format',format.list);
app.post('/formatreq',formatreq.list);

To get started with Watson we would need to connect the Bluemix app to the Watson’s QAAPI as a service by parsing the environment variable. This is shown below

B) simplesync.js


The code in simplesync.js, evidencereq.js, itemsreq.js,formatreq.js are similar. The modules construct the question in the format required. The details of the implementation of simplesync.js is included below a. The Watson’s corpus will be set to ‘healthcare’

parts = url.parse(watson_url +'/v1/question/healthcare');

b. The POST headers are set

// Set the required headers for posting the REST query to Watson
headers = {'Content-Type'  :'application/json',
                  'X-synctimeout' : syncTimeout,
                  'Authorization' : "Basic " + new Buffer(username+":"+passwd).toString("base64")};

c. The POST request options are set

// Create the request options to POST our question to Watson
var options = {host: parts.hostname,
port: 443,
path: parts.pathname,
method: 'POST',
headers: headers,
rejectUnauthorized: false, // ignore certificates
requestCert: true,
agent: false};

The question that is to be asked of Watson needs to be formatted appropriately based on the input received in the appropriate form (for e.g. simplesync.jade)

// Get the values from the form
var syncTimeout = req.body.timeout;
var query = req.body.query;
// create the Question text to ask Watson
var question = {question : {questionText :query }};
var evidence = {"evidenceRequest":{"items":1,"profile":"yes"}};
// Set the POST body and send to Watson
req.write(JSON.stringify(question));
req.write("\n\n");
req.end();

Now you POST the Question to Watson and receive the stream of response using Node.js’ .on(‘data’,) & .on(‘end’) shown below

var req = https.request(options, function(result) {
result.setEncoding('utf-8');
// Retrieve and return the result back to the client
result.on(“data”, function(chunk) {
output += chunk;
});

result.on('end', function(chunk) {		  
           var answers = JSON.parse(output);
			      results = answers[0];
			      res.render(
					 'answer', {
                      "results":results
                                        
			   });
			
});

The results are parsed and formatted displayed using Jade. For the Jade templates I have used a combination of Jade and in-line HTML tags.

Included below is the part of the jade template with in-line HTML tagging

c) answer.jade

if results.question.qclasslist
    for result in results.question.qclasslist
      p <font color="blueviolet">  Value   = <font color="black "> #{result.value} </font> 
  if results.question.focuslist
    p <font color="blueviolet">  Focuslist  </font> = <font color="black "> #{results.question.focuslist[0].value} </font>
  if latlist
    p <font color="blueviolet">  Latlist  </font> = <font color="black "> #{results.question.latlist[0].value} </font>

Disclaimer: This article represents the author’s viewpoint only and doesn’t necessarily represent IBM’s positions, strategies or opinions

Find me on Google+

What’s up Watson? Using IBM Watson’s QAAPI with Bluemix, NodeExpress – Part 1

Published in IBM developerWorks ‘Whats up Watson? Using Watson QAAPI with Bluemix and NodeExpress

In this post I take the famed IBM Watson through the paces (yes, that’s right!, this post is about  using the same  IBM  Watson which trounced 2 human Jeopardy titans in a classic duel in 2011).  IBM’s Watson (see  What is Watson?) is capable of understanding the nuances of the English language and heralds a new era in the domain of cognitive computing. IBM Bluemix now includes 8 services from Watson ranging from Concept Expansion, Language Identification, Machine Translation, Question-Answer etc. For more information on Watson’s QAAPI and the many services that have been included in Bluemix please see Watson Services.

In this article I create an application on IBM Bluemix and use Watson’s QAAPI (Question-Answer API) as a service to the Bluemix application. For the application I have used NodeExpress to create a Webserver and post the REST queries to Watson.  Jade is used format the results of Watson’s Response.

In this current release of Bluemix Watson comes with a corpus of medical facts. In other words Watson has been made to ingest medical documents in multiple formats (doc, pdf, html, text  etc) and the user can pose medical questions to Dr.Watson. In its current avatar, its medical diet consisted of dishes from (CDC Health Topics, National Heart, Lung, and Blood Institute (NHLBI) National Institute of Arthritis and Musculoskeletal and Skin Diseases (NIAMS), National Institute of Diabetes and Digestive and Kidney Diseases (NIDDK), National Institute of Neurological Disorders and Stroke (NINDS), Cancer.gov (physician data query) etc.)

Try out my Watson app  on Bluemix here –  Whats up Watson?

To get down to Watson QAAPI business with Bluemix app you can fork the code from Devops at whatsup. This can then be downloaded to your local machine. You can also clone the code from GitHub at whatsup

  1. To get started go to the directory where you have cloned the code for Whatsup app

2.Push the app to Bluemix using Cloud Foundry’s ‘cf’ commands as shown below

cf login -a https://api.ng.bluemix.net

3. Next push the app to Bluemix
cf push whatsup –p . –m 512M

In the Bluemix dashboard you should see ‘whatsup’ app running. Now click ‘Add Service’ and under Watson add ‘Question Answer’

1

Add Qatson QAAPI

2

You will be prompted with ‘Restage Application’. Click ‘Ok’. Once you have the app running you should be able to get started with Doc Watson.

The code for this Bluemix app with QAAPI as a Service is based on the following article Examples using the Question and Answer API

  1. Here’s a look at the code for the Bluemix & Watson app.

In this Bluemix app I show the different types of Questions we can ask Watson and the responses we get from it. The app has a route for each of the different types of questions and options

a. Simple Synchronous Query: Post a simple synchronous query to Watson
This is the simplest query that we can pose to Watson. Here we need to just include the text of the question and the also a Sync Timeout. The Sync Timeout denotes the time client will wait for responses from the Watson service
// Ask Watson a simple synchronous query

app.get('/question',question.list);
app.post('/simplesync',simplesync.list);

b. Evidence based question: Ask Watson to respond to evidence given to it
Ask Watson for responses based on evidence given like medical conditions etc. This would be a used for diagnostic purposes I would presume.
// Ask Watson for responses based on evidence provided
app.get('/evidence',evidence.list);
app.post('/evidencereq',evidencereq.list);

c. Request for a specified set of answers to a question: Ask Dr. Watson to give a specified number of responses to a question
// Ask Watson to provide specified number of responses to a query
app.get('/items',items.list);
app.post('/itemsreq',itemsreq.list);

d. Get a formatted response to a question: Ask Dr. Watson to format the response to the question
// Get a formatted response from Watson for a query
app.get('/format',format.list);
app.post('/formatreq',formatreq.list);

  1. To get started with Watson we would need to connect the Bluemix app to the Watson’s QAAPI as a service by parsing the environment variable. This is shown below

//Get the VCAP environment variables to connect Watson service to the Bluemix application

question.js
o o o
if (process.env.VCAP_SERVICES) {
var VCAP_SERVICES = JSON.parse(process.env.VCAP_SERVICES);
// retrieve the credential information from VCAP_SERVICES for Watson QAAPI
var hostname   = VCAP_SERVICES["Watson QAAPI-0.1"][0].name;
var passwd = VCAP_SERVICES["Watson QAAPI-0.1"][0].credentials.password;
var userid = VCAP_SERVICES["Watson QAAPI-0.1"][0].credentials.userid;
var watson_url = VCAP_SERVICES["Watson QAAPI-0.1"][0].credentials.url;

Next we need to format the header for the POST request

var parts = url.parse(watson_url);
// Create the request options to POST our question to Watson
var options = {host: parts.hostname,
port: 443,
path: parts.pathname,
method: 'POST',
headers: headers,
rejectUnauthorized: false, // ignore certificates
requestCert: true,
agent: false};

The question that is to be asked of Watson needs to be formatted appropriately based on the input received in the appropriate form (for e.g. simplesync.jade)

question.js
// Get the values from the form
var syncTimeout = req.body.timeout;
var query = req.body.query;
// create the Question text to ask Watson
var question = {question : {questionText :query }};
var evidence = {"evidenceRequest":{"items":1,"profile":"yes"}};
// Set the POST body and send to Watson
req.write(JSON.stringify(question));
req.write("\n\n");
req.end();

Now you POST the Question to Dr. Watson and receive the stream of response using Node.js’ .on(‘data’,) & .on(‘end’) shown below

question.js
…..
      var req = https.request(options, function(result) {
// Retrieve and return the result back to the client
result.on(“data”, function(chunk) {
output += chunk;
});

result.on('end', function(chunk) {
// Capture Watson's response in output. Parse Watson's answer for the fields
var results = JSON.parse(output);
res.render(
'answer', {
"results":results
});
});
});

The results are parsed and formatted displayed using Jade. For the Jade templates I have used a combination of Jade and inline HTML tags (Jade can occasionally be very stubborn and make you sweat quite a bit. So I took the easier route of inline HTML tagging. In a later post I will try out CSS stylesheets to format the response.)

Included below is the part of the jade template with inline HTML tagging

Answer.jade
o o o
<h2 style="color:blueviolet">  Question Details </style> </h2>
for result in results.question.qclasslist
p <font color="blueviolet">  Value   = <font color="black "> #{result.value} </font>
p <font color="blueviolet">  Focuslist  </font> = <font color="black "> #{results.question.focuslist[0].value} </font>
// The 'How' query's response does not include latlist. Hence conditional added.
if latlist
p <font color="blueviolet">  Latlist  </font> = <font color="black "> #{results.question.latlist[0].value} </font>

o o o

Now that the code is all set you can fire the Watson. To do this click on the route

3

Click the route whatsup.mybluemix.net and ‘Lo and behold’ you should see Watson ready and raring to go.

4

As the display shows there are 4 different Question-Answer options that there is for Watson QAAPI

Simple Synchronous Question-Answer
This option is the simplest option. Here we need to just include the text of the question and the also a Sync Timeout. The question can be any medical related question as Watson in its current Bluemix avatar has a medical corpus

For e.g.1) What is carotid artery disease?

2) What is the difference between hepatitis A and hepatitis B etc.

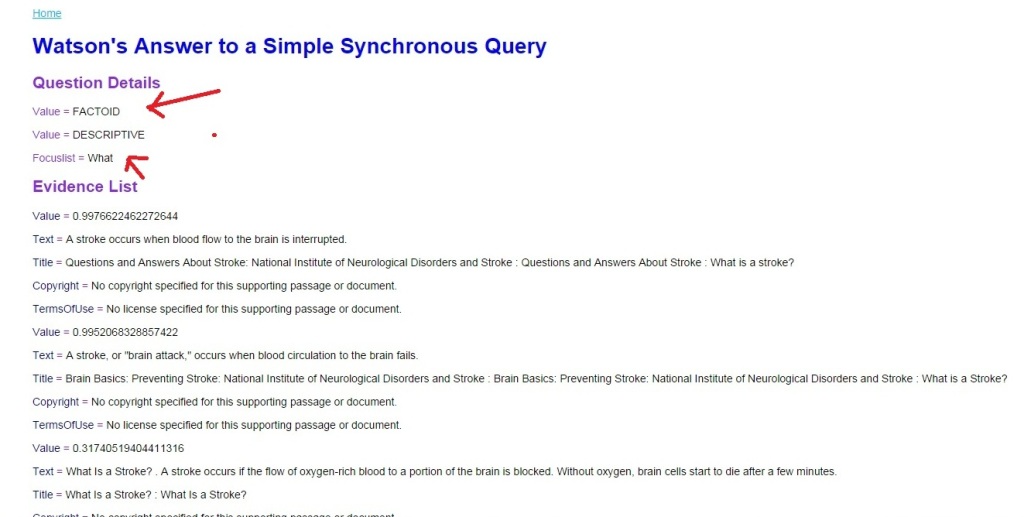
The Sync Timeout parameter specifies the number of seconds the QAAPI client will wait for the streaming response from Watson. An example question and Watson’s response are included below
5
;

When we click Submit Watson spews out the following response

6

Evidence based response:

In this mode of operation, questions can be posed to Watson based on observed evidence. Watson will output all relevant information based on the evidence provided. As seen in the output Watson provides a “confidence factor” for each of its response

7

Watson gives response with appropriate confidence values based on the given evidence

8

Question with specified number of responses
In this option we can ask Watson to provide us with at least ‘n’ items in its response. If it cannot provide as many items it will give an error notification

11

This will bring up the following screen where the question asked is “What is the treatment for Down’s syndrome?” and Items as 3.
9

Watson gives 3 items in the response as shown below
10

Formatted Response: Here Watson gives a formatted response to question asked. Since I had already formatted the response using Jade it does not do extra formatting as seen in the screen shot.
12

Updated synonym based response. In this response we can change the synonym list based on which Watson will search its medical corpus and modify its response. The synonym list for the the question “What is fever?” is shown below. We can turn off synonyms by setting to ‘false’ and possibly adding other synonyms for the search
13

This part of the code has not been included in this post and is left as an exercise to the reader 🙂

As mentioned before you can fork and clone the code from IBM devops at whatsup or clone from GitHub at whatsup

There are many sections to Watson’s answer which cannot be included in this post as the amount of information is large and really needs to be pared to pick out important details. I am including small sections from each part of Watson’s response below to the question “How is carotid artery disease treated/”

I will follow up this post with another post where I will take a closer look at Watson’s response which has many parts to it
namely

– Question Details
14

– Evidence list
15

– Synonym list
16

– Answers

17

– Error notifications
18

There you have it.  Go ahead and get all your medical questions answered by Watson.

Disclaimer: This article represents the author’s viewpoint only and doesn’t necessarily represent IBM’s positions, strategies or opinions

Other posts on Bluemix

1. Brewing a potion with Bluemix, PostgreSQL & Node.js in the cloud
2. A Bluemix recipe with MongoDB and Node.js
3. A Cloud Medley with IBM’s Bluemix, Cloudant and Node.js
4.  Bend it like Bluemix, MongoDB with autoscaling – Part 1

You may also find the following interesting
1. Informed choices through Machine Learning : Analyzing Kohli, Tendulkar and Dravid
2. Informed choices through Machine Learning-2: Pitting together Kumble, Kapil,
3. A crime map of India in R: Crimes against women
4. Analyzing cricket’s batting legends – Through the mirage with R


Find me on Google+

Revisiting Bluemix with Twilio

This post walks you through the steps to use Twilio with IBM’s Bluemix to send an SMS and also make a  voice call when you click a URL.  Twilio, is a cloud communications SaaS organization which allows you to use standard web languages to build voice, SMS and VOIP applications via a Web API.

Twilio provides the ability to build VOIP applications using APIs. Twilio itself resides in the cloud and is always available. It also provides SIP integration which means that it can be integrated with Soft switches. Twilio looks really interesting with its ability to combine the cloud, Web and VOIP, SMS and the like.

The steps given below allow you to use your app to perform 2 things by clicking the app’s URL namely websmstest.bluemix.net

a) Send a SMS to your mobile phone

b) Make a voice call to your mobile phone

The code can be forked from Devops at websmstest

Connecting Twilio with Bluemix

  1. Fire-up a Node.js Webstarter application from the Bluemix dashboard. In my case I have named the application websmstest. Once this is up and running

fig1

2) Click Add a Service and under ‘Web and Application’ and choose Twilio.

3) Enter a name for the Twilio service. You will also need the Account SID and Authorization token

  1. For this go to http://www.twilio.com and sign up

5) Once you have registered, go to your Twilio Dashboard for the Account SID and Auth Token. If the Auth token is encrypted, you can click the ‘lock’ symbol to display the Auth token in plain text.

  1. Enter the Account SID and Auth Token in the Twilio service in Bluemix in the right hand panel shown in the picture below

fig2

  1. To get started click the link websmstest code from Devops.

  2. Next click the ‘Edit Code’ button at the top

  3. Then click ‘Fork’ and provide a suitable name for your project

fig6

  1. Check the option for a) Deploy to Bluemix. Uncheck the other options a) Make it private b) Add features for Scrum development

  2. On the left hand side navigate to the file you need to edit and make the changes with the Devops GUI editor. You will need to make the following changes

Setup the application

12) You will need to modify the following files

  1. manifest.yml
  2. app.js

13) In the manifest.yml make sure you enter the name of your application and the host

applications:

- host: websmstest
  disk: 1024M
  name: websmstest
  command: node app.js
  path: .
  domain: mybluemix.net
  mem: 128M
  instances: 1

14) Lastly make changes to your app.js.

var app = require('gopher'),
    twilio = require('twilio');

 
var config = JSON.parse(process.env.VCAP_SERVICES);
 
var twilioSid, twilioToken;
config['user-provided'].forEach(function(service) {
    if (service.name == 'Twilio') {
        twilioSid = service.credentials.accountSID;
        twilioToken = service.credentials.authToken;
    }
});
 

// URL 
app.get('/', function(request, response) {
    var client = new twilio.RestClient(twilioSid, twilioToken);
 
    /* To make a voice call to your mobile phone uncomment the next 2 lines */
   //client.calls.create({
   //url: "http://twimlets.com/message?Message%5B0%5D=Hello",
   
    
     //  to: Enter your mobile phone  for e.g.98765 43210
     // from: Enter the number Twilio alloted to your account
     // body: The message you would like to send
     client.sendMessage({
    	  to: '+919876543210',
         from: '+16305476427',
         body:'Twilio notification through Bluemix!'
        }, function(err, message) {
        response.send('Message sent! ID:'+message.sid);
    });
});
  1. Enter your mobile number in the ‘to:’ line.

  2. Enter the number provided to you in your Twilio account see below

fig3

  1. In the app.js code above in step 14) use the green highlighted line to send a SMS to your mobile phone

  2. If you uncomment the blue highlighted lines a voice call will be made to your mobile

  3. Finally ‘Deploy’ the application on to Bluemix (more details on Deploying to Bluemix) can be found at Getting started with IBM Bluemix and IBM Devops services using Node.js

Test the application

19) Now click on your application to open the details and then click the link adjacent to the Routes.

fig8

20) You should see that an SMS has been sent as shown

fig4

21) Your mobile should now display the message that was sent as shown below

Screenshot_2014-06-22-13-41-44

22) Uncomment the lines which deal with making voice call and you should receive a voice announcement (see below) (Remember to comment the green highlighted line client.sendMessage!)

1

23) Check the analytics in your Twilio dashboard

fig5

Disclaimer: This article represents the author’s viewpoint only and doesn’t necessarily represent IBM’s positions, strategies or opinions


Find me on Google+

Rock N’ Roll with Bluemix, Cloudant & NodeExpress

Published as a tutorial in IBM Cloudant – Bluemix tutorial and demos

In this post I create a  cloud application that is based on Bluemix, Cloudant DB and NodeExpress.  NodeExpress is used to perform DB operations on  CloudantDB

The code can be forked from Devops from bluemix-cloudant-exp. You can also clone the code from Github from bluemix-cloudant-exp

The following NodeExpress routes are created for performing the basic database operations

  1. a) Displaying the list of books
  2. b) Adding a book
  3. c) Updating a book and
  4. d) Deleting a book

1


Push the app to Bluemix

a) Push the app to Bluemix using
cf push bluemix-cloudant -p . -m 512M

b) In the Bluemix dashboard add the Cloudant service.

c) Double click the CloudantNoSQLDB

9

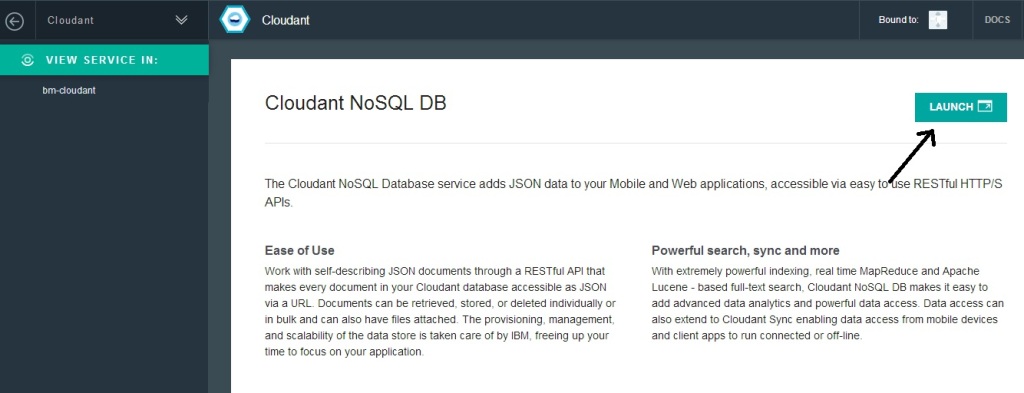
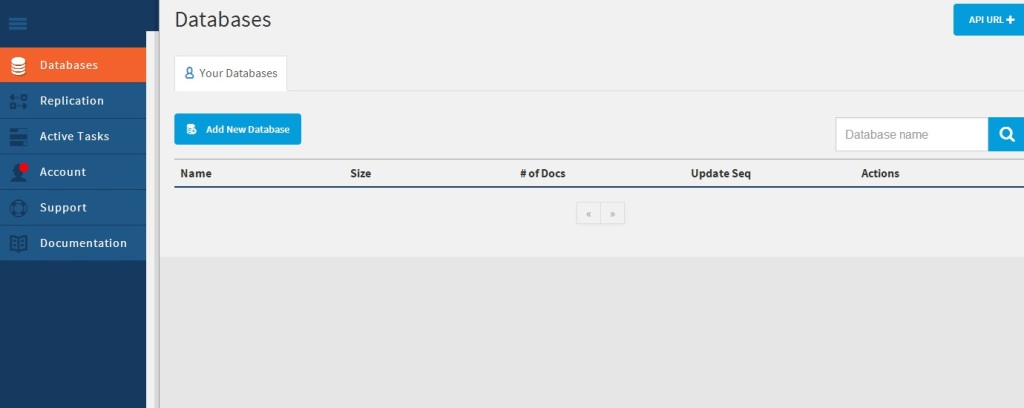
and then click the ‘Launch’ button. This will bring the WebSQL based version of Cloudant DB

10

c) Next click the link bluemix-cloudant.mybluemix.net

11

This will start the Webserver and also populate the database.

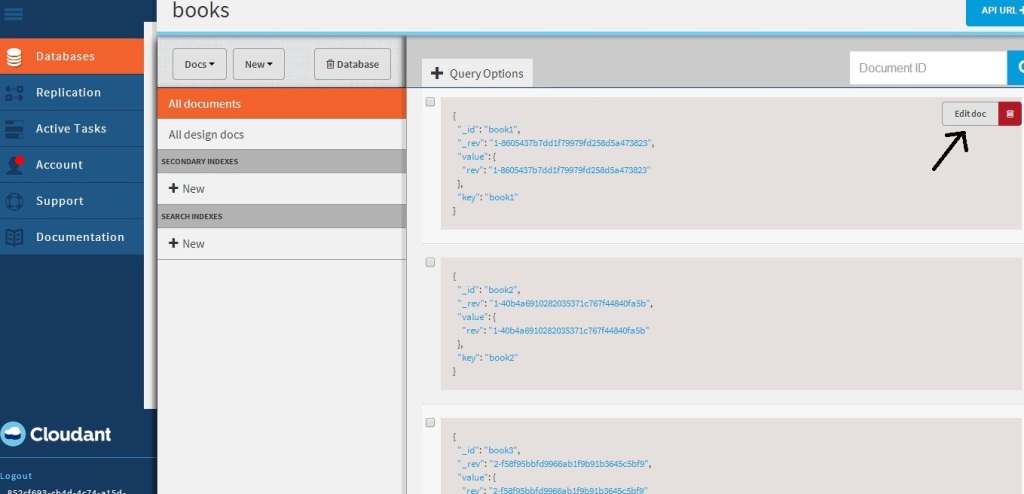
e) This can be seen in the Cloudant Dashboard for the ‘test’ database which has 3 records shown below
12
The setup for these routes in the NodeExpress are as follows

app.get('/', routes.index);
app.get('/booklist', booklist.list);
app.get('/newbook', newbook.list);
app.post('/addbook',addbook.list);
app.get('/changebook', changebook.list);
app.post('/updatebook', updatebook.list);
app.get('/rembook', rembook.list);
app.post('/deletebook',deletebook.list);

Setting up the environment for Cloudant’s PouchDB

The first thing is to setup the environment for Cloudant’s Pouch DB by parsing the process.env environment variables as shown below

//Parse the process.env for the port and host that we've been assigned
if (process.env.VCAP_SERVICES) {
// Running on Bluemix. Parse the port and host that we've been assigned.
var env = JSON.parse(process.env.VCAP_SERVICES);
var host = process.env.VCAP_APP_HOST;
var port = process.env.VCAP_APP_PORT;
console.log('VCAP_SERVICES: %s', process.env.VCAP_SERVICES);
// Also parse Cloudant settings.
var cloudant = env['cloudantNoSQLDB'][0]['credentials'];
}
var db = new pouchdb('books'),
remote =cloudant.url + '/books';
opts = {
continuous: true
};
// Replicate the DB to remote
console.log(remote);
db.replicate.to(remote, opts);
db.replicate.from(remote, opts);

Displaying the list of books

Cloudant responds to DB queries as JSON messages. Hence to display the list of books the fields of each document is stored as an array and then displayed using the Jade table in booklist.jade  This is shown below

  1. a) booklist.js

var docs = db.allDocs(function(err, response) {
val = response.total_rows;
var details = "";
j=0;
var booklist = new Array(val);
for(i=0; i < val; i++) {
db.get(response.rows[i].id, function (err,doc){
j++;
booklist[j] = new Array(3);
booklist[j][0] = doc._id;
booklist[j][1] = doc.Title;
booklist[j][2] = doc.author;
details= details + JSON.stringify(doc.Title) + "  " +  JSON.stringify(doc.author) + "\n";
// Kludge because of Node.js asynchronous handling. To be fixed - T V Ganesh
if(j == val) {
res.render('booklist', {
"booklist" : booklist
});
}
}); // End db.get
} //End for
}); // End db.allDocs

  1. b) booklist.jade

The jade template simply displays the each booklist as a row in a table

block content
h1= "Display the list of books"
p
strong DocId  Title   Author
table
each book, i in booklist
tr
td #{book}
p
p
a(href='/') Home

2

Adding a book
To add a book the book details are obtained using the newbook.jade which display a form
block content
h1= "Add a book"
form#formAddBook(name="addbook",method="post",action="/addbook")
input#inputBookTitle(type="text", placeholder="Title", name="title")
input#inputBookAuthor(type="text", placeholder="Author", name="author")
button#btnSubmit(type="submit") submit
a(href='/') Home

With the values obtained from the form above a document is inserted into the books database as follows

// Get our form values. These rely on the "name" attributes
var Title = req.body.title;
var Author = req.body.author;
db.put({
author: Author,
Title : Title,
}, Title, function (err, response) {
console.log(err || response);
if (err) {
// If it failed, return error
res.send("There was a problem adding the information to the database.");
}
else {
// Redirect to booklist - Display booklist
res.location("booklist");
// And forward to success page
res.redirect("booklist");
}
});

Note: When inserting a document into the books database the docid for the document is set to be the same as the book Title itself

7

4

Updating a book

To update a document we need to input the document id. Also the document to be updated should use the “_rev” field which is obtained when we get the document. The values to be input are taken with the changeuser form

block content

h1= "Update a book"
form#formUpdateBook(name="addbook",method="post",action="/updatebook")
input#inputDocId(type="text", placeholder="DocId", name="docid")
input#inputBookTitle(type="text", placeholder="Title", name="title")
input#inputBookAuthor(type="text", placeholder="Author", name="author")
button#btnSubmit(type="submit") submit
a(href='/') Home

The values obtained are used to populate the document as follows

db.get(DocId, function(err, response) {
db.put({
_id: DocId,
_rev: response._rev,
author: Author,
Title : Title,
}, function(err, response) {
if (err) {
// If it failed, return error
res.send("There was a problem updating the information to the database.");
}
else {
// If it worked, redirect to display books
res.location("booklist");
// And forward to success page
res.redirect("booklist");
}
});
});

6

5

Deleting a document

To delete a document we need the document id which is taken with the rembook.jade form

block content
h1= "Delete a book"
form#formDeleteBook(name="addbook",method="post",action="/deletebook")
input#DocId(type="text", placeholder="DocId", name="docid")
button#btnSubmit(type="submit") submit
a(href='/') Home

//Deleting document book1
db.get(DocId, function(err, doc) {
db.remove(doc, function(err, response) {
if (err) {
// If it failed, return error
res.send("There was a problem removing the information to the database.");
}
else {
// Redirect to booklist
res.location("booklist");
// And forward to success page
res.redirect("booklist");
}
console.log(err || response);
});
});

In the diagram below docid ‘book3’ is deleted

13

8

Important tips

  1. If you run into issues while create a Jade template then do the following

npm install jade --g

You can check your jade template for correctness using

jade <name of jade template>

If the response is ‘rendered <name of jade template>.html’ then the template is fine.

  1. If there are problems with deploying the application or if the application crashes you check the cf logs as follows for the issue

cf logs <name of application> --recent

As mentioned the  code can be forked from Devops from bluemix-cloudant-exp. You can also clone the code from Github from bluemix-cloudant-exp

Disclaimer: This article represents the author’s viewpoint only and doesn’t necessarily represent IBM’s positions, strategies or opinions

See also

1. Brewing a potion with Bluemix, PostgreSQL & Node.js in the cloud
2. A Bluemix recipe with MongoDB and Node.js
3. Spicing up IBM Bluemix with MongoDB and NodeExpress
4. A Cloud Medley with IBM’s Bluemix, Cloudant and Node.js
Find me on Google+

A Cloud medley with IBM Bluemix, Cloudant DB and Node.js

Published as a tutorial in IBM Cloudant – Bluemix tutorial and demos

Here is an interesting Cloud medley based on IBM’s Bluemix PaaS platform, Cloudant DB and Node.js. This application  creates a Webserver using Node.js and uses REST APIs to perform CRUD operations on a Cloudant DB. Cloudant DB is a NoSQL Database as a service (DBaaS) that can handle a wide variety of data types like JSON, full text and geo-spatial data. The documents  are stored, indexed and distributed across a elastic datastore spanning racks, datacenters and perform replication of data across datacenters.Cloudant  allows one to work with self-describing JSON documents through  RESTful APIs making every document in the Cloudant database accessible as JSON via a URL.

This application on Bluemix uses REST APIs to perform the operations of inserting, updating, deleting and listing documents on the Cloudant DB.  The code can be forked from Devops at bluemix-cloudant. The code can also be clone from GitHub at bluemix-cloudant.

1) Once the code is forked the application can be deployed on to Bluemix using

cf login -a https://api.ng.bluemix.net
cf push bm-cloudant -p . -m 512M

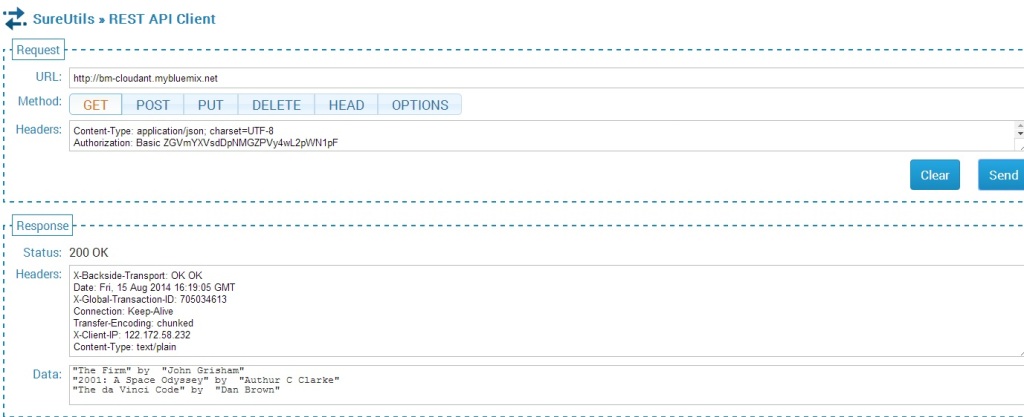
2) After this is successful go to the Bluemix dashboard and add the Cloudant DB service.  The CRUD operations can be performed by invoking REST API calls using an appropriate REST client like SureUtils ot Postman in the browser of your choice.

Here are the details of the Bluemix-Cloudant application

3) Once the Cloudant DB service has been added to the Web started Node.js application we need to parse the process.env variable to obtain the URL of the Cloudant DB and the port and host to be used for the Web server.

The Node.js Webserver is started based on the port and host values obtained from process.env

require('http').createServer(function(req, res) {
//Set up the DB connection
if (process.env.VCAP_SERVICES) {
// Running on Bluemix. Parse for  the port and host that we've been assigned.
var env = JSON.parse(process.env.VCAP_SERVICES);
var host = process.env.VCAP_APP_HOST;
var port = process.env.VCAP_APP_PORT;
....
}
....
// Perform CRUD operations through REST APIs
// Insert document
if(req.method == 'POST') {
insert_records(req,res);
}
// List documents
else if(req.method == 'GET') {
list_records(req,res);
}
// Update a document
else if(req.method == 'PUT') {
update_records(req,res);
}
// Delete a document
else if(req.method == 'DELETE') {
delete_record(req,res);
}
}).listen(port, host);

2) Access to the Cloudant DB Access to Cloudant DB is obtained as follows

if (process.env.VCAP_SERVICES) {
// Running on Bluemix. Parse the port and host that we've been assigned.
var env = JSON.parse(process.env.VCAP_SERVICES);
var host = process.env.VCAP_APP_HOST;
var port = process.env.VCAP_APP_PORT;
console.log('VCAP_SERVICES: %s', process.env.VCAP_SERVICES);
// Also parse Cloudant settings.
var cloudant = env['cloudantNoSQLDB'][0]['credentials'];
}
var db = new pouchdb('books'),
remote =cloudant.url + '/books';
opts = {
continuous: true
};
// Replicate the DB to remote
console.log(remote);
db.replicate.to(remote, opts);
db.replicate.from(remote, opts);

Access to the Cloudant DB is through the cloudant.url shown above

3)  Once the access to the DB is setup we can perform CRUD operations. There are many options for the backend DB. In this application I have PouchDB.

4) Inserting a document: To insert documents into the Cloudant DB based on Pouch DB we need to do the following

var insert_records = function(req, res) {
//Parse the process.env for the port and host that we've been assigned
if (process.env.VCAP_SERVICES) {
// Running on Bluemix. Parse the port and host that we've been assigned.
var env = JSON.parse(process.env.VCAP_SERVICES);
var host = process.env.VCAP_APP_HOST;
var port = process.env.VCAP_APP_PORT;
console.log('VCAP_SERVICES: %s', process.env.VCAP_SERVICES);
// Also parse Cloudant settings.
var cloudant = env['cloudantNoSQLDB'][0]['credentials'];
}
var db = new pouchdb('books'),
remote =cloudant.url + '/books';
opts = {
continuous: true
};
// Replicate the DB to remote
console.log(remote);
db.replicate.to(remote, opts);
db.replicate.from(remote, opts);
// Put 3 documents into the DB
db.put({
author: 'John Grisham',
Title : 'The Firm'
}, 'book1', function (err, response) {
console.log(err || response);
});
...
...
res.writeHead(200, {'Content-Type': 'text/plain'});
res.write("3 documents is inserted");
res.end();
}; // End insert_records

The nice part about Cloudant DB is that you can access your database through the URL. The steps are shown below. Once your application is running. Click on your application. You should see the screen as below.

1

Click on Cloudant as shown by the arrow.

Next click on the “Launch’ icon

2

This should bring up the Cloudant dashboard. The database will be empty.

3

If you use a REST API Client to send a POST API call then the Application will insert 3 documents.

4

The documents inserted can be seen by sending the GET REST API call.

5

The nice part of Cloudant DB is that you can use the URL to see your database. If you refresh your screen you should see the “books” database added. Clicking this database you should see the 3 documents that have been added

6

If you click “Edit doc” you should see the details of the document

7

5) Updating a document

The process to update a document in the database is shown below

// Update book3
db.get('book3', function(err, response) {
console.log(response);
return db.put({
_id: 'book3',
_rev: response._rev,
author: response.author,
Title : 'The da Vinci Code',
});
}, function(err, response) {
if (err) {
console.log("error " + err);
} else {
console.log("Success " + response);
}
});

This is performed with a PUT REST API call

8

The updated list is shown below

9

This can be further verified in the Cloudant DB dashboard for book3.

10

6) Deleting a document

The code to delete a document in PouchDB is shown below

//Deleting document book1
db.get('book1', function(err, doc) {
db.remove(doc, function(err, response) {
console.log(err || response);
});
});

The REST calls to delete a document and the result  are shown below

11

12

Checking the Cloudant dashboard we see that only book2 & book3 are present and book1 has been deleted

13

7) Displaying documents in the database

The code for displaying the list of documents is shown below

var docs = db.allDocs(function(err, response) {
val = response.total_rows;
var details = "";
j=0;
for(i=0; i < val; i++) {
db.get(response.rows[i].id, function (err,doc){
j++;
details= details + JSON.stringify(doc.Title) + " by  " +  JSON.stringify(doc.author) + "\n";
// Kludge because of Node.js asynchronous handling. To be fixed - T V Ganesh
if(j == val) {
res.writeHead(200, {'Content-Type': 'text/plain'});
res.write(details);
res.end();
console.log(details);
}
}); // End db.get
} //End for
}); // End db.allDocs

If you happened to notice, I had to use a kludge to work around Node.js’ idiosyncracy of handling asynchronous calls. I was fooled by the remarkable similarity of Node.js & hence  javascript to C language that I thought functions within functions would work sequentially. However I had undergo much grief  trying to get Node.js to work sequentially. I wanted to avoid the ‘async’ module but was unsuccessful with trying to code callbacks. So the kludge! I will work this out eventually but this workaround will have to do for now!

As always you can use the “Files and Logs” in the Bluemix dashboard to get any output that are written to stdout.

Note: As always I can’t tell how useful the command
'cf  logs <application name> -- recent is for debugging.

Hope you enjoyed this Cloud Medley of Bluemix, Cloudant and Node.js!

Disclaimer: This article represents the author’s viewpoint only and doesn’t necessarily represent IBM’s positions, strategies or opinions

You may also like
1. Brewing a potion with Bluemix, PostgreSQL & Node.js in the cloud
2.  A Bluemix recipe with MongoDB and Node.js
3.  Spicing up IBM Bluemix with MongoDB and NodeExpress
4.  Rock N’ Roll with Bluemix, Cloudant & NodeExpress


Find me on Google+