
In my last post ‘GooglyPlusPlus now with Win Probability Analysis for all T20 matches‘ I had discussed the performance of my ML models, created with and without player embeddings, in computing the Win Probability of T20 matches. With batsman & bowler embeddings I got much better performance than without the embeddings
- glmnet – Accuracy – 0.73
- Random Forest (RF) – Accuracy – 0.92
While the Random Forest gave excellent accuracy, it was bulky and also took an unusually long time to predict the Win Probability of a single T20 match. The above 2 ML models were built using R’s Tidymodels. glmnet was fast, but I wanted to see if I could create a ML model that was better, lighter and faster. I had initially tried to use Tensorflow, Keras in Python but then abandoned it, since I did not know how to port the Deep Learning model to R and use in my app GooglyPlusPlus.
But later, since I was stuck with a bulky Random Forest model, I decided to again explore options for saving the Keras Deep Learning model and loading it in R. I found out that saving the model as .h5, we can load it in R and use it for predictions. Hence, I rebuilt a Deep Learning model using Keras, Python with player embeddings and I got excellent performance. The DL model was light and had an accuracy 0.8639 with an ROC_AUC of 0.964 which was great!
GooglyPlusPlus uses data from Cricsheet and is based on my R package yorkr
You can try out this latest version of GooglyPlusPlus at gpp2023-1
Here are the steps
A. Build a Keras Deep Learning model
a. Import necessary packages
import pandas as pd
import numpy as np
from zipfile import ZipFile
import tensorflow as tf
from tensorflow import keras
from tensorflow.keras import layers
from tensorflow.keras import regularizers
from pathlib import Path
import matplotlib.pyplot as plt
b, Upload the data of all 9 T20 leagues (BBL, CPL, IPL, T20 (men) , T20(women), NTB, CPL, SSM, WBB)
# Read all T20 leagues
df1=pd.read_csv('t20.csv')
print("Shape of dataframe=",df1.shape)

# Create training and test data set
train_dataset = df1.sample(frac=0.8,random_state=0)
test_dataset = df1.drop(train_dataset.index)
train_dataset1 = train_dataset[['batsmanIdx','bowlerIdx','ballNum','ballsRemaining','runs','runRate','numWickets','runsMomentum','perfIndex']]
test_dataset1 = test_dataset[['batsmanIdx','bowlerIdx','ballNum','ballsRemaining','runs','runRate','numWickets','runsMomentum','perfIndex']]
train_dataset1

# Set the target data
train_labels = train_dataset.pop('isWinner')
test_labels = test_dataset.pop('isWinner')
train_dataset1

a=train_dataset1.describe()
stats=a.transpose
a
c. Create a Deep Learning ML model using batsman & bowler embeddings
import pandas as pd
import numpy as np
from keras.layers import Input, Embedding, Flatten, Dense
from keras.models import Model
from keras.layers import Input, Embedding, Flatten, Dense, Reshape, Concatenate, Dropout
from keras.models import Model

# Set seed
tf.random.set_seed(432)

# create input layers for each of the predictors
batsmanIdx_input = Input(shape=(1,), name='batsmanIdx')
bowlerIdx_input = Input(shape=(1,), name='bowlerIdx')
ballNum_input = Input(shape=(1,), name='ballNum')
ballsRemaining_input = Input(shape=(1,), name='ballsRemaining')
runs_input = Input(shape=(1,), name='runs')
runRate_input = Input(shape=(1,), name='runRate')
numWickets_input = Input(shape=(1,), name='numWickets')
runsMomentum_input = Input(shape=(1,), name='runsMomentum')
perfIndex_input = Input(shape=(1,), name='perfIndex')

# Set the embedding size as the 4th root of unique batsmen, bowlers
no_of_unique_batman=len(df1["batsmanIdx"].unique())
no_of_unique_bowler=len(df1["bowlerIdx"].unique())
embedding_size_bat = no_of_unique_batman ** (1/4)
embedding_size_bwl = no_of_unique_bowler ** (1/4)


# create embedding layer for the categorical predictor
batsmanIdx_embedding = Embedding(input_dim=no_of_unique_batman+1, output_dim=16,input_length=1)(batsmanIdx_input)
batsmanIdx_flatten = Flatten()(batsmanIdx_embedding)
bowlerIdx_embedding = Embedding(input_dim=no_of_unique_bowler+1, output_dim=16,input_length=1)(bowlerIdx_input)
bowlerIdx_flatten = Flatten()(bowlerIdx_embedding)

# concatenate all the predictors
x = keras.layers.concatenate([batsmanIdx_flatten,bowlerIdx_flatten, ballNum_input, ballsRemaining_input, runs_input, runRate_input, numWickets_input, runsMomentum_input, perfIndex_input])

# add hidden layers
# Use dropouts for regularisation
x = Dense(64, activation='relu')(x)
x = Dropout(0.1)(x)
x = Dense(32, activation='relu')(x)
x = Dropout(0.1)(x)
x = Dense(16, activation='relu')(x)
x = Dropout(0.1)(x)
x = Dense(8, activation='relu')(x)
x = Dropout(0.1)(x)

# add output layer
output = Dense(1, activation='sigmoid', name='output')(x)
print(output.shape)

# create a DL model
model = Model(inputs=[batsmanIdx_input,bowlerIdx_input, ballNum_input, ballsRemaining_input, runs_input, runRate_input, numWickets_input, runsMomentum_input, perfIndex_input], outputs=output)
model.summary()

# compile model
optimizer=keras.optimizers.Adam(learning_rate=.01, beta_1=0.9, beta_2=0.999, epsilon=1e-07, decay=0.0, amsgrad=True)

model.compile(optimizer=optimizer, loss='binary_crossentropy', metrics=['accuracy'])

# train the model
history=model.fit([train_dataset1['batsmanIdx'],train_dataset1['bowlerIdx'],train_dataset1['ballNum'],train_dataset1['ballsRemaining'],train_dataset1['runs'],
           train_dataset1['runRate'],train_dataset1['numWickets'],train_dataset1['runsMomentum'],train_dataset1['perfIndex']], train_labels, epochs=40, batch_size=1024,
          validation_data = ([test_dataset1['batsmanIdx'],test_dataset1['bowlerIdx'],test_dataset1['ballNum'],test_dataset1['ballsRemaining'],test_dataset1['runs'],
           test_dataset1['runRate'],test_dataset1['numWickets'],test_dataset1['runsMomentum'],test_dataset1['perfIndex']],test_labels), verbose=1)

plt.plot(history.history["loss"])
plt.plot(history.history["val_loss"])
plt.title("model loss")
plt.ylabel("loss")
plt.xlabel("epoch")
plt.legend(["train", "test"], loc="upper left")
plt.show()

Model: "model_5"
__________________________________________________________________________________________________
 Layer (type)                   Output Shape         Param #     Connected to
==================================================================================================
 batsmanIdx (InputLayer)        [(None, 1)]          0           []

 bowlerIdx (InputLayer)         [(None, 1)]          0           []

 embedding_10 (Embedding)       (None, 1, 16)        75888       ['batsmanIdx[0][0]']

 embedding_11 (Embedding)       (None, 1, 16)        55808       ['bowlerIdx[0][0]']

 flatten_10 (Flatten)           (None, 16)           0           ['embedding_10[0][0]']

 flatten_11 (Flatten)           (None, 16)           0           ['embedding_11[0][0]']

 ballNum (InputLayer)           [(None, 1)]          0           []

 ballsRemaining (InputLayer)    [(None, 1)]          0           []

 runs (InputLayer)              [(None, 1)]          0           []

 runRate (InputLayer)           [(None, 1)]          0           []

 numWickets (InputLayer)        [(None, 1)]          0           []

 runsMomentum (InputLayer)      [(None, 1)]          0           []

 perfIndex (InputLayer)         [(None, 1)]          0           []

 concatenate_5 (Concatenate)    (None, 39)           0           ['flatten_10[0][0]',
                                                                  'flatten_11[0][0]',
                                                                  'ballNum[0][0]',
                                                                  'ballsRemaining[0][0]',
                                                                  'runs[0][0]',
                                                                  'runRate[0][0]',
                                                                  'numWickets[0][0]',
                                                                  'runsMomentum[0][0]',
                                                                  'perfIndex[0][0]']

 dense_19 (Dense)               (None, 64)           2560        ['concatenate_5[0][0]']

 dropout_19 (Dropout)           (None, 64)           0           ['dense_19[0][0]']

 dense_20 (Dense)               (None, 32)           2080        ['dropout_19[0][0]']

 dropout_20 (Dropout)           (None, 32)           0           ['dense_20[0][0]']

 dense_21 (Dense)               (None, 16)           528         ['dropout_20[0][0]']

 dropout_21 (Dropout)           (None, 16)           0           ['dense_21[0][0]']

 dense_22 (Dense)               (None, 8)            136         ['dropout_21[0][0]']

 dropout_22 (Dropout)           (None, 8)            0           ['dense_22[0][0]']

 output (Dense)                 (None, 1)            9           ['dropout_22[0][0]']

==================================================================================================
Total params: 137,009
Trainable params: 137,009
Non-trainable params: 0
__________________________________________________________________________________________________
Epoch 1/40
937/937 [==============================] - 11s 10ms/step - loss: 0.5683 - accuracy: 0.6968 - val_loss: 0.4480 - val_accuracy: 0.7708
Epoch 2/40
937/937 [==============================] - 9s 10ms/step - loss: 0.4477 - accuracy: 0.7721 - val_loss: 0.4305 - val_accuracy: 0.7833
Epoch 3/40
937/937 [==============================] - 9s 10ms/step - loss: 0.4229 - accuracy: 0.7832 - val_loss: 0.3984 - val_accuracy: 0.7936
...
...
937/937 [==============================] - 10s 10ms/step - loss: 0.2909 - accuracy: 0.8627 - val_loss: 0.2943 - val_accuracy: 0.8613
Epoch 38/40
937/937 [==============================] - 10s 10ms/step - loss: 0.2892 - accuracy: 0.8633 - val_loss: 0.2933 - val_accuracy: 0.8621
Epoch 39/40
937/937 [==============================] - 10s 10ms/step - loss: 0.2889 - accuracy: 0.8638 - val_loss: 0.2941 - val_accuracy: 0.8620
Epoch 40/40
937/937 [==============================] - 10s 11ms/step - loss: 0.2886 - accuracy: 0.8639 - val_loss: 0.2929 - val_accuracy: 0.8621
d. Compute and plot the ROC-AUC for the above model
from sklearn.metrics import roc_curve

# Select a random sample set
tf.random.set_seed(59)
train = df1.sample(frac=0.9,random_state=0)
test = df1.drop(train_dataset.index)
test_dataset1 = test[['batsmanIdx','bowlerIdx','ballNum','ballsRemaining','runs','runRate','numWickets','runsMomentum','perfIndex']]
test_labels = test.pop('isWinner')

# Compute the predicted values
y_pred_keras = model.predict([test_dataset1['batsmanIdx'],test_dataset1['bowlerIdx'],test_dataset1['ballNum'],test_dataset1['ballsRemaining'],test_dataset1['runs'],
           test_dataset1['runRate'],test_dataset1['numWickets'],test_dataset1['runsMomentum'],test_dataset1['perfIndex']]).ravel()

# Compute TPR & FPR
fpr_keras, tpr_keras, thresholds_keras = roc_curve(test_labels, y_pred_keras)

fpr_keras, tpr_keras, thresholds_keras = roc_curve(test_labels, y_pred_keras)
from sklearn.metrics import auc

# Plot the Area Under the Curve (AUC)
auc_keras = auc(fpr_keras, tpr_keras)
plt.figure(1)
plt.plot([0, 1], [0, 1], 'k--')
plt.plot(fpr_keras, tpr_keras, label='Keras (area = {:.3f})'.format(auc_keras))
plt.xlabel('False positive rate')
plt.ylabel('True positive rate')
plt.title('ROC curve')
plt.legend(loc='best')
plt.show()
The ROC_AUC for the Deep Learning Model is 0.946 as seen below

e. Save the Keras model for use in Python
from keras.models import Model
model.save("wpDL.h5")
f. Load the model in R using rhdf5 package for use in GooglyPlusPlus
library(rhdf5)
dl_model <- load_model_hdf5('wpDL.h5')
This was a huge success for me to be able to create the Deep Learning model in Python and use it in my Shiny app GooglyPlusPlus. The Deep Learning Keras model is light-weight and extremely fast.
The Deep Learning model has now been integrated into GooglyPlusPlus. Now you can check the Win Probability using both a) glmnet (Logistic Regression with lasso regularisation) b) Keras Deep Learning model with dropouts as regularisation
In addition I have created 2 features based on Win Probability (WP)
i) Win Probability (Side-by-side – Plot(interactive) : With this functionality the 1st and 2nd innings will be side-by-side. When the 1st innings is played by team 1, the Win Probability of team 2 = 100 – WP (team1). Similarly, when the 2nd innings is being played by team 2, the Win Probability of team1 = 100 – WP (team 2)
ii) Win Probability (Overlapping) – Plot (static): With this functionality the Win Probabilities of both team1(1st innings) & team 2 (2nd innings) are displayed overlapping, so that we can see how the probabilities vary ball-by-ball.
Note: Since the same UI is used for all match functions I had to re-use the Plot(interactive) and Plot(static) radio buttons for Win Probability (Side-by-side) and Win Probability(Overlapping) respectively
Here are screenshots using both ML models with both functionality for some random matches
B) ICC T20 Men World Cup – Netherland-South Africa- 2022-11-06
i) Match Worm wicket chart

ii) Win Probability with LR (Side-by-Side- Plot(interactive))

iii) Win Probability LR (Overlapping- Plot(static))

iv) Win Probability Deep Learning (Side-by-side – Plot(interactive)
In the 213th ball of the innings South Africa was slightly ahead of Netherlands. After that they crashed and burned!

v) Win Probability Deep Learning (Overlapping – Plot (static)
It can be seen that in the 94th ball of both innings South Africa was ahead of Netherlands before the eventual slump.

C) Intl. T20 (Women) India – New Zealand – 2020 – 02 – 27
Here is an interesting match between India and New Zealand T20 Women’s teams. NZ successfully chased the India’s total in a wildly swinging fortunes. See the charts below
i) Match Worm Wicket chart

ii) Win Probability with LR (Side-by-side – Plot (interactive)

iii) Win Probability with LR (Overlapping – Plot (static)

iv) Win Probability with DL model (Side-by-side – Plot (interactive))

v) Win Probability with DL model (Overlapping – Plot (static))

The above functionality in plotting the Win Probability using LR or DL with both options (Side-by-side or Overlapping) is available for all 9 T20 leagues currently supported by GooglyPlusPlus.
Go ahead and give gpp2023-1 a try!!!
Do also check out my other posts’
- Deep Learning from first principles in Python, R and Octave – Part 7
- Big Data 6: The T20 Dance of Apache NiFi and yorkpy
- Latency, throughput implications for the Cloud
- Design Principles of Scalable, Distributed Systems
- Cricpy adds team analytics to its arsenal!!
- Analyzing performances of cricketers using cricketr template
- Modeling a Car in Android
- Using Linear Programming (LP) for optimizing bowling change or batting lineup in T20 cricket
- Introducing QCSimulator: A 5-qubit quantum computing simulator in R
- Experiments with deblurring using OpenCV
- Using embeddings, collaborative filtering with Deep Learning to analyse T20 players
To see all posts click Index of posts

 Checkout my book ‘Deep Learning from first principles: Second Edition – In vectorized Python, R and Octave’. My book starts with the implementation of a simple 2-layer Neural Network and works its way to a generic L-Layer Deep Learning Network, with all the bells and whistles. The derivations have been discussed in detail. The code has been extensively commented and included in its entirety in the Appendix sections. My book is available on Amazon as


 In this book I implement some of the most common, but important Machine Learning algorithms in R and equivalent Python code.


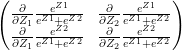 – (A)
– (A)


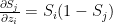 when i=j
 when
when 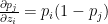 when i=j

 when i=j and 0 when


 (1)
(1) (2)
(2)


 when i=j
 when
when 


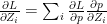
 which similarly reduces to


 and
and 
 and
and 


