This post is a follow-up to my earlier post – How to program – Some essential tips. In this post I expand on some of the ideas of my earlier post.
Programming means different things to different people. To some programming is a drudgery almost akin to manual labor, to others programming is an insurmountable mountain full of frustrations and disappointments while to others it is an intense problem solving and a creative activity. In my opinion programming can mean anything to you. It is your attitude towards coding that make it a chore, a daunting task or something really creative.
Here are some my insights on how to go about learning to code
Eyes wide open: People generally get frustrated when a piece of code that they wrote does not do what they intended it to do. In some cases the code snippet will do nothing when they were expecting final result, sometimes the code will crash or it will go into an infinite loop and drive the person nuts. (Let me assure you – I have been there, done that!) The usual reaction when this happens is anger and frustration where we generally tinker around with the code only to get the same result. Soon the emotions will progress from anger to hopelessness.
The first thing that one needs to while coding is to keep your ‘eyes wide open’. We tend to be guilty of ignoring the error messages that show up. Here one way to attack coding
a) Fully understand the ‘what’ of the problem. If there is an infinite loop or a core dump check after which point does it happen? If there is an execution error, what is the error trying to tell us?
b) Next look into ‘why’ the error occurred. You could either use debugger or insert appropriate print statements to take the offending code apart.
c) Thirdly think ‘how‘ you can address the situation. Make appropriate changes and re-run the code
d) Did it solve the issue.If yes, move forward. Otherwise go to step a)
Remember that we learn more from our programming mistakes more than when our code just ‘happens’ to work! Mistakes in our code make us to explain every part of the program
Changing times:
Times have changed. Programming Zen and programming now are worlds apart. In many ways, IDEs, Git, Google etc. have made the programmer’s life a lot easier
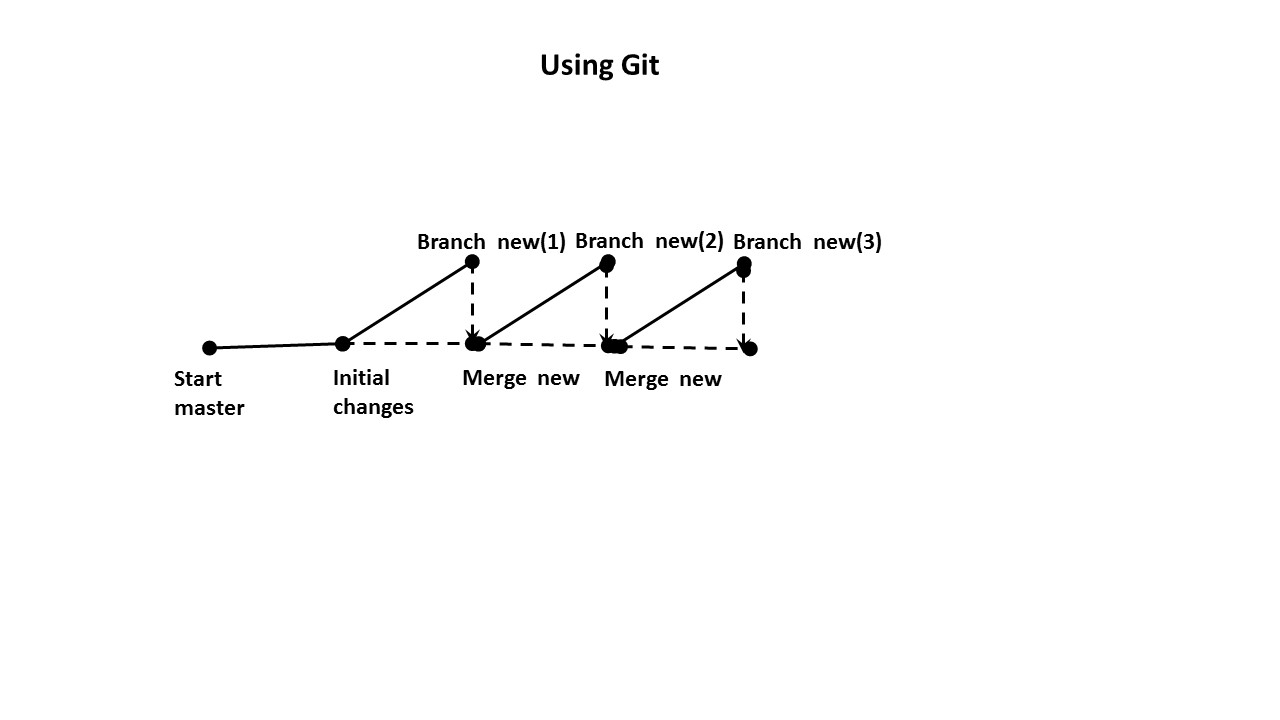
‘Git’ing from here to there: Here is a trick that I learnt fairly recently, though it should have occurred to me more than 2 years back. This is using Git judiciously for all programming tasks (Note: I am saying nothing new here!). I find it really useful in writing code with incremental changes. I create my initial code on the master and then test out incremental changes on a ‘new branch’ even for personal projects. Once I have proved a small increment works, I merge it with the ‘main’ branch. I again start working on the ‘new’ for the next incremental change followed by a merge to the master
The steps are
Make initial changes
1. git add .
2. git commit –m “ Initial changes’
Create a new branch
3. git checkout –b ‘new
Make incremental changes. Test.
4.git add .
5. git commit –m “Change 1”
Merge with the master
6.git checkout master
7. git merge new
Continue to work with ‘new’.
8 . git checkout new
9. Go to step 4)
This process can be continued till you get your final product. I find this extremely useful instead of just using an IDE to make code changes. Invariably you can run into a situation where you had something working some time back and in the next instant it is broken and you can’t figure out all the changes you made to the working code. This can be extremely frustrating. With Git you have a history of changes and you can switch to an earlier version of working code and start from there.
Rarely do I find a reason to have more than 1 branch
Here is a pictorial version of this
Taking help from Dr. Google: For most questions and errors that you encounter you will find others who have hit similar bugs. Just google it. You will more than surprised that others went down the exact same path that you are treading. Besides the internet is full of tutorials, blogs and articles on key aspects of programming
Explore the cave of Stack overflow: Spend time exploring Stack overflow. Stack overflow is replete with code snippets and questions that you wanted to ask. There is so much information out there. If you really don’t find an answer to your problem, post it in Stack overflow and you are bound to get an answer or a link to a similar question asked previously
Finally programming requires dollops of patience. Develop patience along with your skill in coding and soon programming will much more enjoyable to you.
1. Programming languages in layman’s language
2. The common alphabet of programming languages
3. How to program – Some essential tips
4. The mind of a programmer
You may also like
1. A crime map of India in R: Crimes against women
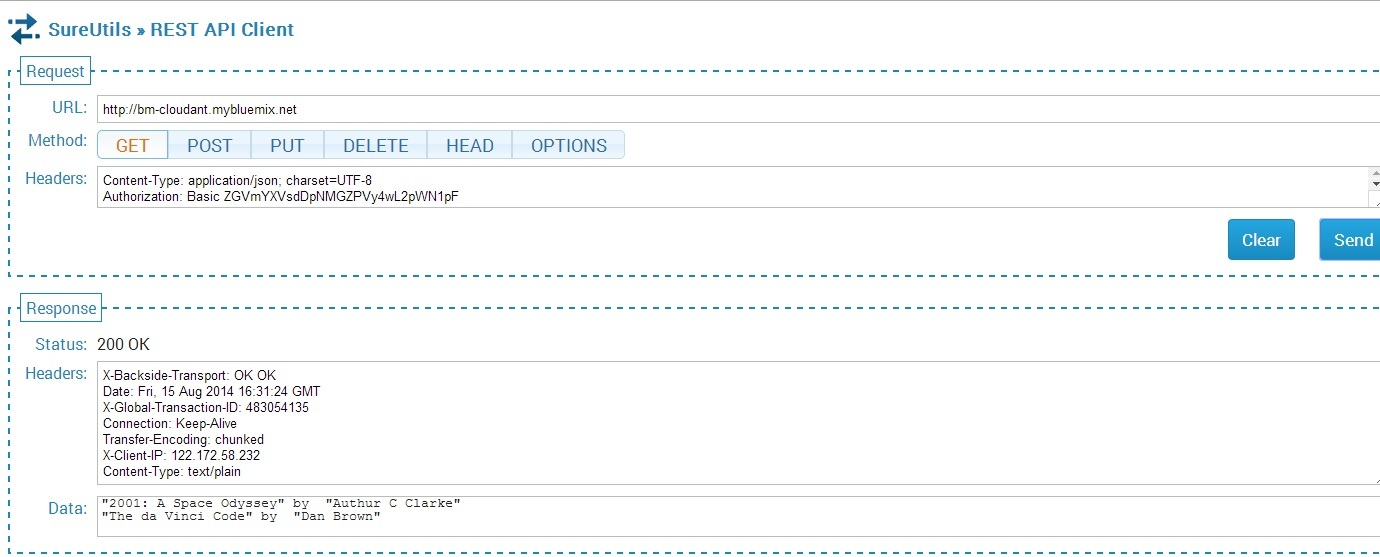
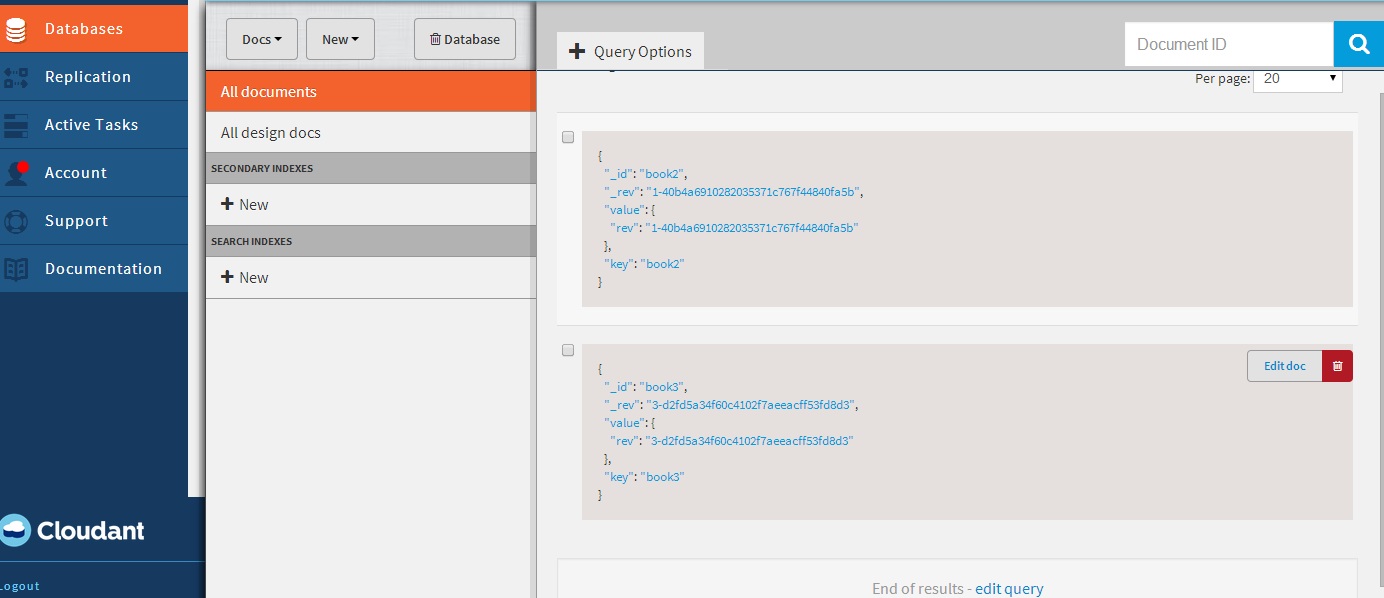
2. What’s up Watson? Using IBM Watson’s QAAPI with Bluemix, NodeExpress – Part 1
3. Bend it like Bluemix, MongoDB with autoscaling – Part 2
4. Informed choices through Machine Learning : Analyzing Kohli, Tendulkar and Dravid
5. Thinking Web Scale (TWS-3): Map-Reduce – Bring compute to data
6. Deblurring with OpenCV:Weiner filter reloaded